Content brought to you by PTEN. To subscribe, click here.
A parasitic battery drain is a bandit that creeps in during the night and kills your battery, sometimes leaving behind no evidence of the crime. The procedures to diagnose a battery drain can be time-consuming and tedious, especially when an electronic module offers no clues to the events that occurred the night before. Effectively utilizing the proper diagnostic equipment and a little ingenuity should lead to a proper diagnosis.
With the doors closed and the key removed, all modules in the vehicle should enter sleep mode within seventy-five minutes of shutting down. The current drain on a battery should not exceed .050A once the modules have turned off. Battery drains are typically caused by a module that remains awake or continues to wake up, sometimes turning on other modules in the network.
The amount of time it takes a current draw to kill a battery depends on the battery's condition and the magnitude of the draw. In most cases, a small drain under 1A will take a couple of days to discharge a battery. A parasitic drain close to an amp or higher will cause a quick overnight death.
Dead Ford Battery
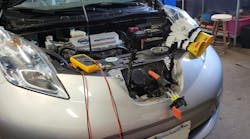
A 2015 Ford Fusion was towed to our shop with a dead battery. The customer stated that the battery died overnight. The first thing we did was charge and test the battery. It's essential that the battery is in good condition and fully charged before testing for a battery drain. I like to use an easy-to-carry portable battery charger. I hooked up my Dewalt DXAEC801B battery charger and let the battery charge for about two hours. My Midtronics EXP-890 battery load tester verified that the battery was fully charged and in good condition.
After checking for aftermarket add-ons, a common cause of a battery drain, we took the vehicle on a road test. The vehicle should be driven over 30 mph for at least five minutes before testing for a current draw. The idea is to turn things on and wake things up. So, we activated everything from the sunroof to the power seats.

Module Test
After the road test, we checked all the modules for Diagnostic Trouble Codes (DTC). A faulty module or a module receiving a bogus input can drain a battery, so DTCs should be addressed before continuing with battery drain diagnosis. I use the OBD Auto Doctor app on my phone when I need to see what DTCs are in which modules. It works fast and saves a lot of time. If there's an issue, I use my OTC 3896 Evolve full-function scan tool for diagnosis.
After we determined that there were no DTCs in any modules, we needed to ensure that nothing remained on once the vehicle was shut down. We turned off the ignition and exited the vehicle with the key, locking the doors with the windows down. We opened the hood and the trunk, engaging the latches and disengaging the pin switches so we could see the cargo lights go out.
We waited a couple of minutes until everything shut off, looking closely at all dash and instrument illumination. The slightest glow in a touchscreen, a radio knob, or a shift indicator is all it takes to kill a battery overnight. Once we determined that nothing was staying on, we opened all the doors and engaged the latches in case we needed to access the vehicle's interior during diagnosis. The modules won't sleep with an open door.
DMM Testing
We hooked up my Fluke Digital Multi Meter (DMM) between the negative battery post and the negative cable terminal. Using the positive side is okay if the negative terminal is difficult to access. I like to install a jumper wire between the post and the terminal before attaching the DMM. A current surge capable of blowing the fuse in your meter occurs when completing the circuit between the battery post and the terminal. The jumper is there to take the hit. Don't use cheap test leads.
You need to be confident that the test lead you're using will provide a low-resistance connection while carrying a reasonable amount of current. I use a set of Klein Tools test leads that I fully trust to maintain a good solid connection. With the DMM on the amps setting, we attached the like polarity lead to the post and the other lead to the battery terminal then removed the jumper wire. We then had to wait about seventy-five minutes for the modules to deactivate.
During this time and for the remainder of testing, we had to be careful not to touch the outside door handles or the keyless entry keypad. This will send an entry signal that will wake up the entire network, which means waiting another seventy-five minutes.

Thermal Imaging Tool
After the waiting period, we verified a 1.12A drain on the battery, so we broke out the Snap-on model EETH311 Thermal Imaging Tool. Since electrons moving through a circuit create heat, it's safe to assume that whatever circuit is pulling, the amperage is warmer than the rest. Sure enough, fuse F23 in the battery junction box (BJB) glowed red in the thermal image (Figure 2). Pulling fuse F23 dropped the battery drain to an acceptable .026A. Looking at the wiring diagram in Figure 1, we can see that fuse F23 supplies power to six modules and three sensors.
This is where it gets tricky. The obvious next move is to start disconnecting modules one by one. This can involve a lot of tear-down time. The diagram shows that the current passing through fuse F23 exits the BJB at pin 40. Circuit CBB23 then splits into three directions. I use an inexpensive Jasleen inductive ammeter to determine the current flow direction.

Inductive Ammeter
Pulling the three circuit CBB23 wires from the harness, I used the inductive ammeter to test each wire for current. Once I found the wire carrying the load, I needed to determine which wire it was (Figure 3). As you can see, all three wires are the same color. So, I snipped the wire and hooked up my OTC 3896 scanner. The DC-to-DC module was off the network, the drain was gone with the fuse installed, and the wire snipped. The DC-to-DC module was the cause of the battery drain.
I soldered the snipped wire and covered it with shrink tube. It's essential to use a good quality soldering iron. There's nothing worse for an electrical connection than a cold solder. I use a Weller WEP70 because it's small, easy to handle in tight places, and gets really hot.
Replacing the DC to DC module fixed the battery drain.

Recording Current Flow
The most difficult current draw to diagnose is the one that sticks around just long enough to kill the battery, then leaves. Most Fluke digital multimeters can record current flow over many hours, showing you what the lowest and highest reading was during that time period. Setting up a recording will verify that there is a draw, but not where it originates. An inductive ammeter with the ability to record allows recording individual harnesses, narrowing the current draw down to specific circuits. Even then, be prepared for a long diagnostic journey when diagnosing an intermittent battery drain.
Diagnosing a battery current drain requires time and patience. Chances are that you'll have to sit out the seventy-five-minute wait period more than once, and attempting to take shortcuts can only lead to a misdiagnosis. A diligent technician, a patient customer, and the right tools and equipment should produce an accurate diagnosis.