When it comes to selecting a thermal camera for use in the automotive field there are a few key factors to consider.
1. Thermal resolution
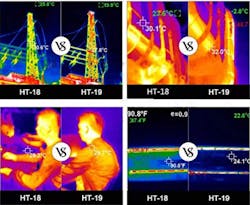
For automotive use, 320 by 240 px is on the higher end with most mid-range cameras being 220 by 160 px. The reason resolution is important is for electrical testing. Say I am looking at a fuse box to determine what fuse has a load going across it, being able to see the fuses and not just a blob of orange on the screen makes it much easier to know which one has current flowing through it.
2. Image and emissivity adjustments
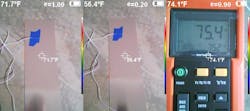
The ability to overlay a thermal image over the original picture, adjust that image to the right spot on the screen, and modify the emissivity of the camera is important. This makes the picture clearer and makes it easier to decipher what you are looking at. Being able to adjust or move the image ensures that the image does not create a “ghost effect” which makes it difficult to see what you are looking at.
Emissivity modification is also critical to getting a proper thermal reading. Emissivity is a surface’s ability to emit energy as thermal radiation. When choosing your emissivity setting, it is dependent on the object’s surface being either shiny or dull. If you choose the wrong setting for the object’s attribute, then the temperature reading will not be correct. Being able to adjust the emissivity to the correct setting helps ensure an accurate reading.
3. Temperature range
The thermal imager’s range must go low enough to test in most cold climates but must also go high enough to use for testing exhaust components. A range of -40 to 600 degrees F is good for most automotive applications. We want to be able to look at an exhaust manifold on startup while a misfire is occurring and be able to see what runner is the coldest indicating a misfire. Also, being able to look at a catalytic converter to see if it might be clogged is another cool use for the thermal imager. While running, the outside temperatures of most catalytic converters can reach temperatures in excess of 600 degrees F, so it’s easiest to check for a clog when the vehicle first starts and the exhaust is cold as well.
4. Saving and uploading images
Being able to take a picture with the thermal camera and then easily upload it to your digital vehicle inspection report is a great form of show-and-tell for a customer. Some cameras have a micro-SD card that can be inserted in a computer, while some have internal memory storage and can be plugged into the computer to get the pictures off. Some of the higher-end cameras have Wi-Fi capability which means you can stream what you are seeing to any mobile device. For example, the Seek Shot Series and Flir C3 have the Wi-Fi capability.
In my opinion, the easiest way to upload pictures is to just use a thermal device that plugs into your phone or tablet like the Flir One Pro and Seek Compact Pro Series. These devices work in conjunction with an app on your mobile device or tablet, and your pictures are saved directly to your photos.
5. Price point
A thermal imager starts around $400 for a mid-level imager, while some can be upwards of $1,800. Of the more expensive imagers, some may have the same resolution, temperature range, and overall abilities of a less expensive camera from a reputable, well-known company. The devices that can be attached to a mobile device are a great economical option, as most are at a lower price point, but have similar picture quality and features to more expensive cameras.
Information provided by Oasis Scientific


