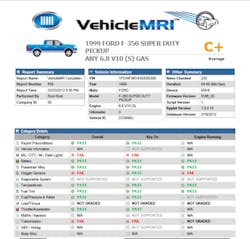
Case study – 2002 F250 6.8L V10 Gas
Tools used:
· Diagnostic scan tool
· Vehicle repair information
Historically, the mechanical repair segment of the automotive independent aftermarket led the way for the collision industry when it came to adopting strategies and tools to efficiently and effectively repair vehicles. In fact, many collision shops sublet mechanical repairs to either the dealer or independent repair shops.
Over the past few years, the collision industry has taken the lead with a relatively new process when it comes to diagnosing vehicles. With more and more computer technology being used on vehicles today, the collision industry implemented a pre- and post-scan function into the repair process. This approach to repair was initiated by the insurance industry in order to obtain adequate information at the beginning of the repair process. Scans were implemented in order to determine if there were conditions present that could increase the cost of the repair to the point it would become economically unfeasible to do so; if such was the case, the vehicle would be declared a total loss. Additionally, the post-scan would reveal if there were still issues present that could cause either an incomplete repair or an unsatisfied customer. If your mechanical repair shop is not performing pre and post-scan tests, you should consider the benefits of starting the process. As a matter of fact, many, if not most, scan tool manufacturers are making this feature part of their scan tools. Many current scan tool models offer a wireless module that is connected to the vehicle, which is able to scan the vehicle then generate a report that can be sent to the service advisor and/or customer.
Many years ago, in our shop, as part of our diagnostic test process, we instituted a practice of scanning every module on each vehicle before and after repairs. This allowed us to form a more complete diagnosis as well as assure the vehicle did not have additional issues once the primary repair was completed. We firmly believe this is one of the reasons we have both an extremely low comeback rate along with very satisfied customers. The results of both scans were documented on the technician notes section of our diagnostic worksheet.
In order to see the benefits of a pre and post-scan process, let’s go over some of the reasons a pre-scan, followed by a post-scan, may help you repair vehicles more effectively. We will also provide a case study that created a situation where we would have released a vehicle that still had an issue after we “repaired” the cause of an illuminated check engine light (CEL).
The pre-scan
Being as the majority of the vehicles that enter your shop having a problem that requires a diagnostic process of at least one computer system are Controller Area Network (CAN) equipped, a complete system scan is necessary. A complete system scan is the backbone of a pre-scan process. Many shops and technicians have a tendency to grab either a code reader or scan tool and obtain codes from the powertrain control module (PCM). This practice is fine and, in many cases, will save you time, some of the time.
The fact is, with CAN equipped vehicles, information from other modules is essential in order for everything to work together correctly. Faults in modules other than the PCM may cause either drivability or no start issues, even without the presence of a diagnostic trouble code (DTC) in the PCM.
A complete scan will give you a clear picture of any other modules having issues, which can provide more clues for diagnosing the root cause of a problem, or if there are problems within other modules that should be addressed. Best practices say to note and repair “U” codes first because module communication codes can prevent you from repairing the vehicle quickly and completely.
Along with scanning all modules, it is critical to have a complete understanding of what conditions need to be met in order to not only trigger a fault code, but what could prevent a fault code from registering. As explained in our case study later in this article, this information is crucial in order to completely repair a vehicle.
As important as fault codes are, you must remember what they actually are. That is, fault codes are just one of the symptoms of a failed system or component, and a point at which to start your diagnostic process. Along with obtaining which, if any, fault codes are present is the need to determine if there are any monitored systems that have either a pending code or have not yet completed the process to determine if there is a problem within the system.
Pending codes should be assessed to see if their presence is due to any conditions that were created by the original issue or fault. Monitors that are incomplete can cause a check engine light to illuminate once that monitor completes and determines there is a fault present. Incomplete monitors can be caused by either a condition that exists from the original issue, or conditions that are not allowing the requirements to be met that are necessary to run the monitor.
Some common causes for incomplete monitors include ambient air temperature not within the allowed ranges, short drive cycles, low fuel levels, and other faults’ presence, such as misfires, that prevent the monitor from running. Check your vehicle information source to see the conditions that will set a code and the conditions necessary for the monitor to complete.
At a minimum, you should share the results of scans that show issues in other modules, pending codes, and incomplete monitors with your customer. This is important because you always need to remember that the most likely reason the customer brought the vehicle in was for a single symptom – an illuminated check engine light. Any potential cause for the engine light to come on again should be discussed with your customer.
The post-scan
After repairs have been completed, it is vital to re-scan all modules. Not only do you need to make sure the repaired system is functioning properly, but you also need to make sure the system that had a problem was not preventing a different system from monitoring its condition. This could create a situation where a check engine light could illuminate if the now able-to-run system monitor detects a fault. This becomes abundantly clear in the following case study.
Case study: 2002 Ford F-250, 6.8L V10 gasoline engine
This vehicle came in with the CEL illuminated and an obvious misfire present. The initial scan showed a P0303 (misfire on cylinder number 3) code and a P1000 (all monitors have not been completed since last clearing) code. No additional codes were present in other systems, there were no pending codes, and the evaporative emission control (EVAP) and heated oxygen sensor (HO2S) monitors were incomplete.
Since a P1000 code was present and an EVAP monitor is typically one of the last to run, we did not concentrate on the EVAP system at that time. The fact that the HO2S monitor had not completed led us to look further into what could stop that particular monitor from running, especially due to the fact that having either incomplete or incorrect data from oxygen sensors can directly affect cylinder operation. We went to Mitchell 1 and found that in order for the EVAP monitor to run, it required the HO2S monitor to complete and pass its system test beforehand. Additionally, the HO2S monitor is not able to run if there are any misfire codes present. With this information, our concentration shifted to the cause of the misfire, with the assumption that once it was repaired, all of the monitors could run.
While inspecting the ignition components, we found an obviously corroded connector on the ignition coil for cylinder 3. All other coils showed small amounts of corrosion on the boots, and the spark plugs showed extended gaps. We suggested to the customer that we replace the one ignition coil, all the spark plugs, and all the coil boots. These repairs corrected the misfire. We cleared the fault codes and performed a drive cycle. A post-scan revealed a P1000 code. Looking at the monitors, we found that the HO2S monitor had now completed, but the EVAP system had not yet completed. We returned the vehicle to the customer; we asked them to drive the vehicle for a few days and to return to the shop so that we could see whether or not there were issues with the EVAP system once the monitor was completed.
This is where it gets interesting. When the vehicle returned, we connected our scan tool to the vehicle and found a P1000 code. The vehicle had been driven about 75 miles over the course of a few days, so all monitors should have been completed. We then checked the monitor status and found none of the monitors were completed.
We had scanned the truck after our original repair and road test and had confirmed that all the monitors had run, except the EVAP system. We asked the customer if the battery had either been disconnected or jump-started. Either situation could have caused the system to clear codes requiring monitors to be re-run. They said they had no battery issues. Our next step was to perform another drive cycle to see if the monitors would run. After a twenty-minute test drive, we connected the scan tool and again saw a P1000 code and that all monitors were complete except the EVAP system.
In order to make sure there was nothing that could cause the computer memory to clear, I asked the customer to wait another few minutes so we could check the computer again. Here is where we found that our technician had made a mistake; he connected the scan tool with the engine running right after the road test, without cycling the key. When we connected the scan tool after the engine had been off for a while, we found the computer had reset.
We then returned to Mitchell 1 and found the wiring diagram for the computer’s keep-alive memory. Tracing the circuit, we found where someone had used a splice tap to obtain power for an aftermarket device. At some later date, the aftermarket device was removed but the tap, which had damaged the wire, was not repaired. This meant that when the engine was running, the computer had power to run the monitors; once the key was turned off, the keep-alive, or retained, power to the computer was not present, which cleared the computer’s memory.
We repaired the wire and road tested the vehicle, then subsequently retested the vehicle after all the monitors had a chance to complete. We found that the P1000 code was no longer present and there were no current or pending codes.
In a case like this, a lack of power allowing the computer memory to erase is not necessarily a huge issue. Conversely, it will cause untold diagnostic challenges down the road. In most states that require smog checks, incomplete monitors cause a vehicle to fail a test. This is one example of how performing both a pre and post-scan can assure vehicles are completely repaired.


