In this article, we’ll address safety and convenience options specifically for commonly used twin-post lifts, with two primary focus points: shop safety and increased efficiency.
Information sources
The primary source for lift inspection, proper operation, lifting procedures, and annual training is the Automotive Lift Institute or ALI (www.autolift.org), an association of vehicle lift manufacturers. Lifting procedures vary depending upon the lift type being used.
Lifting points
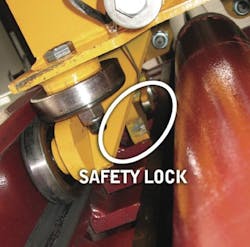
When the lift is set correctly, and prior to a technician servicing the vehicle while on the lift, the weight of the vehicle should be maintained by the mechanical safety locks, rather than by hydraulic pressure. The hydraulic system should be used only for lifting and lowering, and not for vehicle support during service.
A two-post lift engages the vehicle frame or lifting points. It is absolutely critical that lift operators are able to reference the specific lifting points for every vehicle that is to be raised on a lift.
To help shop technicians determine manufacturer-specific lift points, lift manufacturers who are ALI members include a copy of the book Lifting Point Guide (LPG) with every lift they ship.
However, the book is updated each year, so it’s imperative that shop owners purchase a new, updated copy of the lifting guide annually. The guide covers 20 years of vehicle lift points. A five-year-old version of the guide is missing information on the last five years of vehicles. If you don’t have the current guide, you’ll end up playing guessing games with regard to lift points. Choosing the wrong lift points can pose a real safety risk, along with potential undercarriage damage.
Consider vehicle weight
Another critical issue to consider is the weight of the vehicle and the capacity of the lift. Every brand of two-post lifts has four telescoping swing arms that actually support the vehicle. So, it’s vital to know the per-arm capacity (determined by dividing the total capacity of the lift by the four swing arms) so the arms will never be overloaded.
Let’s use the example of a one-ton work truck with a standard load of tool boxes or service equipment. The lift we have is a 10,000-lb. capacity lift, meaning a maximum load of 2,500 lbs. per swing arm is the most we should try to lift. The truck we use in this example might only weigh 9,000 lbs. However, after putting the truck on a scale, we determine the rear axle has a weight of 6,000 lbs., while the front axle has a weight of 3,000 lbs. This means our 9,000-lb. truck is overloading our 10,000-lb. capacity lift because the 2,500-lb.-rated rear arms are overloaded with 3,000 lbs. on them. Large work trucks are often much heavier at the rear than at the front. Lift capacity should be based on the actual weight of the truck.
[PAGEBREAK]
Citing this example, according to Steve Perlstein of Mohawk Resources Ltd., raising the vehicle safely requires a 12,000-lb. capacity lift to accommodate the 6,000-lb. (heavy) rear-end vehicle.
“Try this same example with one of your 13,000 to 14,000-lb. loaded utility trucks,” Perlstein said. “You’ll soon find the required lift for these vehicles (based on the likely 8,000-lb. rear axle) is in the 16,000- to 20,000-lb. capacity range.”
A weight scale may be featured on a lift, which alerts the technician if the lift is loaded near capacity, but in the example mentioned earlier, this won’t really help, since almost all work trucks are rear heavy.
NOTE: We’ll touch on this repeatedly, but always remember that you should never rely on hydraulic pressure alone to support a vehicle. Always raise a bit beyond your desired work height, then lower onto the locking blocks.
When the scale reads no weight, the operator then knows that the vehicle is now resting on the mechanical safety locks rather than leaving the load raised under hydraulic pressure.
The ALI booklet titled Lifting It Right covers the proper procedures for safely raising all vehicles on all types of lifts. For example, the two-post side-by-side lift should always be slightly raised a few inches, at which time the technicians should also jounce the front or rear bumper to make sure the vehicle is securely resting on the proper lifting points.
Lift maintenance tips
– Inspect each lift daily.
– Grease columns at least once each month (some brands, but not all).
– Inspect cables for signs of corrosion, kinking, fraying, cutting, etc. If abnormal wear is found, replace the cable immediately.
– Inspect all moving parts for cleanliness and wear, including locks, arms, arm pivot points, arm telescoping sections, lift posts and pads, etc.
– Visually inspect all welds for signs of faults. If a weld crack or separation is discovered, stop using the lift and contact the manufacturer.
– It may seem inconvenient, but you should perform a daily check for fastener looseness, including the bolts that secure the lift to the floor. Check tightness of bolts that secure the overhead lateral brace (if so equipped).
– Clean the lift regularly of any contaminants such as grease, mud, dirt, etc. This not only keeps the lift looking presentable, but more easily allows you to inspect and discover wear and faulty components.
– Schedule a certified inspector to inspect all of your lifts on an annual basis. A trained expert can often discover problems that you may have missed.
– Inspect the hydraulic reservoir and lines for signs of fluid leakage. If any hydraulic fluid leak is discovered, however minute, immediately stop using the lift until the problem has been corrected.
– If the lift is equipped with a pressure gauge, pay attention to the gauge, especially when placing a heavy-ended vehicle on the lift to prevent overloading the lift and/or to prevent overloading one end of the lift. However, simply looking at the weight gauge can be deceptive. Pay attention to weight distribution. On a heavily loaded job truck, the rear may be severely overloaded.
– When performing a visual inspection, try to remember to place a bubble gauge on each vertical post. While shifting is unlikely, any change in the vertical can indicate a potential floor fastening issue, which must be addressed immediately. Be sure to check level at both the side and front or rear of each post. Any lean condition is especially critical with a twin-post style lift. A slope indicator is available from many lift makers that attaches to the lift post. This not only aids in adjusting the lift during installation but provides an indicator of any changes.
– Lift arm pads generally feature rubber cushions. Keep the rubber surfaces clean. Oil/grease contamination will reduce the frictional capability of the rubber. Also, imbedded debris (rocks, metal chips, small bolts/nuts, etc.) will gouge undercar surfaces and will further degrade the pad rubber.
[PAGEBREAK]
OSHA concerns
According to Kevin Rohlwing, Tire Industry Association (TIA) senior vice president of training, “The main thing right now from a safety perspective that OSHA seems to be focusing on are lifts. Dealers/shops have to make sure that all lifts are functional and that all the safety stops are operational and everything is properly labeled.
“The most common safety issues uncovered during a lift inspection center around maintenance issues, product misuse and poor or non-existent operator training.
A few examples might include: slack, rusty, dry or damaged link chains or wire ropes; worn rotating parts; worn sliding parts; worn vehicle contact points; and missing over-travel stop.
Other examples include lift controls and safety devices that have been over-ridden, removed or damaged; obliteration of labels; use of incorrect components or parts; unintended use; deformed structural components; failure to employ proper care in operation or maintenance; or missing instructional materials.”
Lift inspectors certified by ALI will tag every lift that passes inspection with a serialized, color-coded inspection label that indicates the month and year the lift passed inspection.
A unique four digit number is on every label to identify the person performing each lift inspection. In this way it is easy to see at a glance if lifts are current on their inspection requirements and ALI is able to trace each and every inspection to the inspector placing the label on the lift.
Safety reminders
– Keep the immediate lift area clear of debris and parts, such as brooms, tool carts, parts and parts carts, debris sweepings, etc. NEVER lean a wheel/tire against a vertical lift post, as this can easily cause a dangerous obstruction when the lift is lowered, which can easily damage the tire as well as a dangerous imbalance of the vehicle when lowered.
– As soon as a vehicle has been lowered and removed from the lift, immediately sweep/clean the floor area in and around the lift. A routine floor cleaning will help prevent lift contamination and will reduce the chances of a technician tripping or slipping on a cluttered or slippery floor. Keeping the floor clean will also help to spot various potential vehicle fluid leaks.
– If a lift is installed outdoors (not the best choice but sometimes a necessary location for some shop owners), it should be protected from rain/snow by a rigid shelter to minimize corrosion and contamination of airborne contaminants. Any lift installed outdoors will require more frequent inspection and maintenance.
– Never rely on hydraulic pressure alone to secure a raised vehicle. Once raised to working height, the lift should be lowered onto its locking blocks so that the vehicle is mechanically supported by the lift blocks, and not relying on the hydraulic system.
– When washing the shop floor, remember to raise the lift arms up and away to prevent excessive water contamination. This will reduce the chances of rust on the arms, arm pad extensions, etc. This is especially important in areas where winter road salt contamination is present.
– As mentioned earlier, pay attention to weight limits. Especially when dealing with rear-heavy utility trucks such as a plumber’s truck, it’s easy to overload the rear swing arms of your lift if you only consider the overall vehicle weight. This is a very common problem that many shops face. Improper distribution of weight can overload even the best lifts if the lift isn’t rated for the type of weight distribution that some utility trucks feature. When purchasing a lift, consider moving to a heavier-rated (higher capacity) lift to deal with these vehicles.
– When working under a vehicle, the use of a light is a routine requirement. To avoid tripping over an extension cord, the use of a cordless (rechargeable) light may be the best choice, or the use of an overhead-mounted extension cord that doesn’t lie on the shop floor.
Shop floor requirements
Reinforced concrete floors must be able to safely accommodate the weight of the lift in addition to the loaded weight. Before purchasing any lift, check with the manufacturer for their recommendation regarding floor thickness. In general, a concrete floor must feature a thickness of at least 4.250 inches to as much as 8 inches, depending on the specific lift and its intended use. If the shop was purchased from a previous owner and you’re unsure of floor thickness, drill a few test holes in order to determine thickness.
Don’t rely on only one test hole, as a poorly prepared base may feature irregular high/low areas, resulting in a variation of concrete thickness. A local excavator may be able to determine thickness using a sonar gauge. If the intended location of the lift is not adequate in terms of floor thickness, you’ll have no choice but to have the area cut out, dug deeper, reinforced (screen/rebar) and re-poured to obtain the required thickness.
Time-saving and safety add-ons to consider
Speedlane ramps: Double-ended ramps can be easily added to twin-post lift arms. This creates a drive-on situation, eliminating the need for laying down on the floor to position the lift pads, allowing the vehicle to be raised under suspension load. They can also be positioned for frame contact by adding rubber stanchions. This option can save time and increase worker safety by reducing knee and back strain.
Head guards: Offered by most lift makers, these “nerf” foam pads are attached to the ends of the arms. While head-banging may be fun during a rock concert, it’s no fun to whap your head into an exposed lift arm. These pads provide an inexpensive way to avoid headaches.
Back-savers/wheel hangers: As wheel and tire packages become heavier, removing a wheel/tire package, placing it on the floor, then picking it up for reinstallation is a strain on legs and backs. This device attaches to the lift arm and features a horizontal “peg” that allows you to hang a wheel by its center hole, holding the wheel at lift arm height. Remove the wheel from the vehicle, hang it on the “back saver,” slip it off the peg and install on the hub without the need to handle the weight by bending to and from the floor. The peg features a nylon bump-stop to prevent the wheel from slipping off. As examples, Mohawk refers to theirs as a “Back-Saver,” and Rotary Lift calls theirs a “Wheel Wing.”
[PAGEBREAK]
Tire grabbers: Instead of lifting the vehicle from its frame/belly, with the simple bolt-on addition of tire adapters, the vehicle can be lifted by its suspension without contact to the undercarriage. This provides several advantages, including avoiding scratches on a restored vehicle’s undercarriage, easier location of the arms, and it reduces arm obstructions, gaining easier access to undercar areas.
Door guards: Accidentally banging a customer’s door into a lift post is always embarrassing. The placement of a simple foam pad onto the posts safeguards against door dings.
Laser spotters: When aligning a vehicle with a single technician, it’s sometimes a challenge to properly center the vehicle left/right on the first attempt. A laser spotting guide is an option offered by some makers (citing Rotary as an example) that projects a green laser line in the middle of the bay.
The driver/technician drives between the posts, aligning the center of the hood or dash to the laser line.
Another fairly new innovation is the battery-powered twin-post lift. While it’s not the purpose of this article to tout specific brands, Rotary Lift’s Shockwave is an example, operating on DC power with a built-in charger, eliminating the need for 220V wiring.
Advantages include use of the lift in the event of a power outage, and reportedly faster up/down speeds.
LIFT MANUFACTURERS
Bend Pak/Ranger
1645 Lemonwood Dr.
Santa Paula, CA 93060
800-253-2363
www.bendpak.com
Challenger Lifts
200 Cabel St.
Louisville, KY 40206
(800) 648-5438
www.challengerlifts.com
Maha USA LLC
2404 East Highway 134
Pinckard, AL 36371
(866) 624-2872
www.maha-usa.com
Mohawk Resources Ltd.
65 Vrooman Ave.
Amsterdam, NY 12010
(800) 833-2006
www.mohawklifts.com
Rotary Lifts
2700 Lanier Dr.
Madison, IN 47250
(800) 640-5438
www.rotarylift.com
Stertil-Koni USA
200 Log Canoe Circle
Stevensville, MD 21666
(800) 336-6637
www.stertil-koni.com
American Lift Institute (ALI)
PO Box 85
Cortland, NY 13045
(607) 756-7775
www.autolift.org ●


