The most important fluid on the car and how to test it
Whether you're working on a passenger car or something a little bigger, the brake fluid is arguably one of the most important fluids under its hood and knowing how to test and inspect the brake fluid properly will allow you to provide good customer service.
Inspecting your customers’ brake fluid is critical to maintaining the safe operation of the braking system and it's something you should do not only when the vehicle is in for brake repair but as part of any routine maintenance inspection you perform.
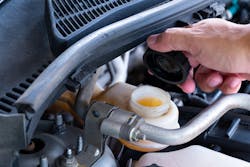
Fluid level is your first stop. Brake systems are sealed systems so there are only two reasons the fluid in the master cylinder should be low: One, there's an external leak somewhere or two, the brake pads are wearing down.
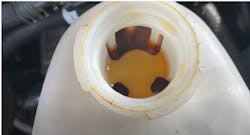
In either case, never simply just add fluid, rather inspect the braking system. Determine the root cause of the loss of fluid and fix the cause. The condition of the brake fluid is as important as the fluid level in the master cylinder, and the first myth I want to dispel is that you can judge the condition of the fluid simply by its appearance.
Once new brake fluid is installed in the system it can darken pretty quickly as it comes into contact with the various seals and hoses. Even brand new vehicles never driven can have a dark tint to their fluid simply because of the assembly lube that was used during manufacturing. Instead focus your attention on two areas: moisture content and indications of corrosion that may be taking place in the system.
You may know that brake fluid typically used for automotive purposes is highly hygroscopic. That means it can absorb moisture very easily. If there is a high moisture content in the brake fluid, that can lower the brake fluid's boiling point and that means softer pedal feel, brake fade, and longer stopping distances.
While some sources still point to moisture as one of the most common sources for brake system damage, it's not as common as you might think.
Because of the use of EPDM hoses and better sealed systems, more common is internal corrosion that starts as the inhibitors that were added
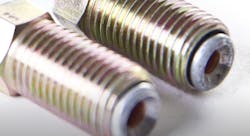
to the brake fluid begin to break down over time. An early sign of corrosion is the presence of copper particles in the fluid that originate from the copper brazing used inside of the steel brake lines. The presence of copper particles in the fluid can damage internal ABS components and accelerate the corrosion of other components in the braking system.
So, how do you test for these conditions? Let's start with checking moisture content. A common pencil style brake fluid tester is all that is needed, and it works by measuring the conductivity of the fluid. The more moisture in the fluid, the more conductive it will be.
Another method for testing is through the use of a test strip. Now, there are a number of manufacturers that produce these test strips and they can test not only the moisture content but the amount of copper present in the fluid as well. That is the current standard for inspecting the condition of the brake fluid. You see the copper particle content is directly related to the health of the inhibitor package that protects the entire system from corrosive damage. The Motorist Assurance Program (or MAP guidelines) while offering no specification for moisture, does recommend fluid replacement when copper content exceeds 200 ppm.
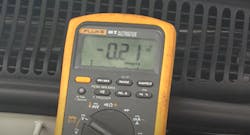
But what if your customer has had their brake fluid flushed in the past? Much of the copper particles that once were in the system have now been flushed away. There's another side effect though: As the inhibitor package wears, the fluid itself becomes more acidic and we can test that with a voltmeter. Place the negative meter lead at the negative battery post and then insert the positive meter lead into the brake fluid, being careful not to allow the tip to contact anything but the fluid. If your meter reads more than 0.30V, consider recommending a fluid exchange to your customer.
There is also a company that offers test strips that actually measure the pH or acidity of the brake fluid. As the inhibitor package deteriorates, the pH level will drop from its normal 7.0 to 11.5 range. pH levels of 6.0 or less indicate a fluid that has outlived its useful life and requires servicing.
About the Author
Pete Meier
Former Creative Director, Technical | Vehicle Repair Group
Pete Meier is the former creative director, technical, for the Vehicle Repair Group with Endeavor Business Media. He is an ASE certified Master Technician with over 35 years of practical experience as a technician and educator, covering a wide variety of makes and models. He began writing for Motor Age as a contributor in 2006 and joined the magazine full-time as technical editor in 2010. Pete grew the Motor Age YouTube channel to more than 100,000 subscribers by delivering essential training videos for technicians at all levels.
Connect with Pete on LinkedIn.


