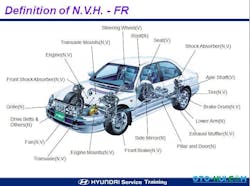
Noise, vibration, and harshness (NVH) issues become a concern when the driver perceives this as a problem. The subject of NVH can include a host of issues, including but not limited to a vibration at a specific road speed, a vibration under engine load, a vibration during braking, engine noises that are unusual or simply annoying, a shake or vibration felt at the shifter, a whistling noise from underhood, what the driver perceives as a “too harsh/rough ride,” and more. When such issues arise, depending on the degree, they can be unpleasant to the senses — and the vehicle owner expects you to remedy the unwanted behavior.
Vibration
There are four basic categories that we can use to inspect a vibration issue.
A vibration that continues after the cause has been removed is “free" vibration. As an example, when a tire hits a pothole the vibration will stop after the pothole impact.
A vibration that only occurs as long as the force that initiated the vibration remains is “forced” vibration. If a driveshaft is unbalanced, the vibration only occurs while the driveshaft is rotating, just as an unbalanced wheel/tire stops vibrating when the vehicle is not moving. The “forced” vibration is the most common type of vibration that shops tend to deal with.
Another type of vibration involves “torsional” vibration, experienced when the vehicle is under hard acceleration (application of torque). This vibration is felt through the seat and floor.
Telegraphing vibrations are caused by a component that now transfers the vibration to another component. As an example, a wheel that is out of balance may transfer the vibration to the steering wheel. The steering system transfers this vibration to the steering wheel. Other examples would include worn or damaged engine or transmission mounts or an exhaust pipe that is touching the body that transfer the vibration to the passenger cabin, etc.
It Might Not Be the Wheel's Fault
When a vibration complaint enters the shop, try not to automatically assume that the wheels are out of balance. All too often, a vibration complaint is blamed on tire/wheel imbalance. We need to be aware that there are many variables that can be the actual cause.
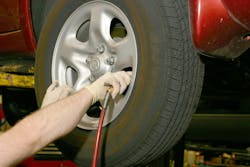
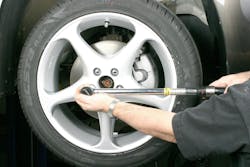
This can include worn or loose wheel/hub bearings or improperly torqued wheel fasteners. The wheel may not be mated squarely to the hub face due to debris on the mating surfaces, or a CV shaft may have lost its rubber damper.
Other potentials include worn, damaged, or missing control arm bushings, an out-of-balance driveshaft, debris such as mud or ice built up in the wheel, tires that have been flat-spotted, worn shocks/struts, or excessive wheel runout (for example a lug-centric wheel mated to a hub-centric hub).
If you’ve ruled out all of the above, consider inspecting for broken weld joints (on a unibody vehicle).
Check the Tire and Wheel
Don’t automatically assume that the wheels are properly centered onto their respective hubs. Some aftermarket wheels may not properly center to the hubs (a hubcentric concern). Wheel-to-hub centering (a radial runout concern) should deviate by no more than about 0.004". If the runout is out of spec, first mark the existing location, then rotate the wheel (wheel clock position relative to the hub). If the clearance is still out of specification, check the hub for runout to determine if the condition is in the hub or the wheel. A tolerance stack-up condition may exist, which may be corrected by re-clocking the wheel relative to the hub.
Radial Force Variation
Tire radial force variation (RFV) is a key consideration when diagnosing tire-related vibrations that occur at varying speeds and conditions. Today, vehicle manufacturers commonly phase match tires to align the tire’s point of maximum RFV with the wheel’s point of minimal radial runout (high point of tire to low point of wheel).
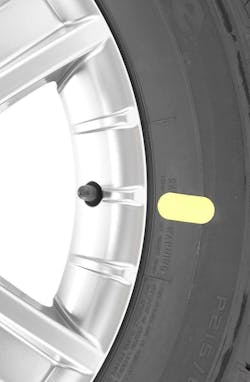
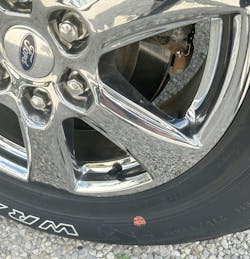
A tire’s maximum RFV is generally indicated by a RED dot on the tire which should be aligned with the WHITE dot on the wheel (if the wheel features this dot). The red dot on the tire indicates the tire’s maximum RFV, while the white dot on the wheel indicates the wheel or rim’s minimum radial runout point. If the vehicle is fitted with alloy wheels, the tire’s red dot should be aligned with the valve stem, as this should be the minimum radial runout point. A third dot , YELLOW in color, may also be featured on the tire sidewall. This yellow dot indicates the lightest point of the tire (in terms of weight from a balance consideration).
Even if dynamic wheel balance (from a standpoint of weight) is correct, misalignment of the red and white dots will likely result in a vibration complaint.
- Red dot on tire: Align to the wheel’s low-point dimple (steel wheel), or to the valve stem on an alloy wheel, or to a white dot on the wheel if the wheel features a white dot.
- Yellow dot on tire: Align to the wheel’s valve stem. Both red and yellow dots on tire: The red dot takes precedence. Align the red dot to the wheel dimple or valve stem.
As any high spots on the tire contact the road surface, this results in an up/down motion. This motion transfers into the suspension system, which in turn may be felt by the driver. We’ll call this the first order vibration.
This second order vibration is caused by a second bump in the tire as a result of the change in shape due to centrifugal force.
Since there are two vibrations in one rotation of the tire, the second order vibration will be higher, about twice the frequency of the first order. A spike on a frequency analyzer will appear at that frequency.
A NVH issue doesn’t need to be the loudest noise or strongest vibration. It could be one that has recently developed or one that is simply not acceptable to the customer, while some noises may be acceptable. (This can vary among owners.)
As an example, moderate-to-loud tire pattern noise from a vehicle equipped with big block or lug pattern tires could be acceptable to the owner of a 4x4, as he or she intends to use the vehicle off-road and is willing to accept the noise when on paved roads. However, a complaint on the same vehicle could be much more subtle, and caused by a driveline problem.
Because we sense vibration and sound using different senses, we tend to discuss them separately. However, vibration and sound are essentially identical.
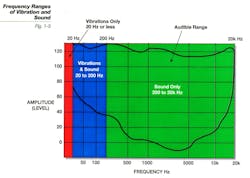
A sound is a vibration, which is actually a pressure fluctuation of the air. Vibrations and sounds are both expressed as waves per second called Hertz (Hz).
Vibrations between 20 Hz – 20,000 Hz are audible by humans. Vibrations over 20,000 Hz are ultrasonic and are not audible by humans.
As far as tire- and wheel-related vibrations are concerned, first perform a basic inspection. Check to see that all tires are the same brand and model, load spec and size (always check the tire tag, owner’s manual or service manual, since some vehicles may feature different front and rear tire sizes). Always check tire pressures per the tire inflation tag. Inspect each tire for damage, deformation, and wear. (Cupped treads can be an indication of worn shocks, etc.) Check for flat spots that may have resulted from brake lockup. Also, take a close look at each tire’s bead seating. An improperly installed tire whose inner or outer bead is not seated correctly will create a radial runout condition.
Brakes
Customer complaints involving vibration or noise during braking are common issues. Brake noise can either involve a squeal noise or a scraping noise. Squeal tends to occur when the brake pads “flutter” as they contact the rotor disc. The use of anti-squeal shims (often integrated onto many new pads) or the application of an anti-squeal silicone at the backing plates often cures this. If the caliper features multiple pistons (a two-piston caliper for instance), check the caliper for sticking piston(s) that prevent the pads from evenly contacting the rotor disc upon first application. Obviously, pads and/or rotors that are glazed should be replaced. When replacing pads, it is always recommended to either re-surface the rotors or replace the rotors, so provide a fresh contact surface so that the pad material properly transfers into the rotor disc’s machined surface.
Grinding or scraping noises obviously indicate a problem, most likely due to pad wear-out, with exposed metal contacting the rotor. Also check for foreign material that may be lodged between a pad and rotor, such as a small stone.
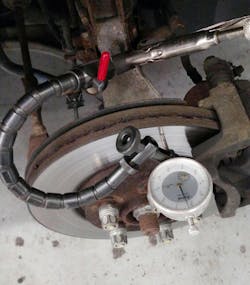
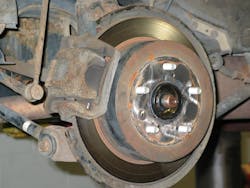
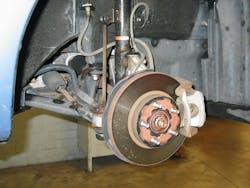
Braking vibrations (and associated pedal bounce) is a clear indication of a lateral runout issue, the result of either a warped rotor, which could be caused by uneven or excessive wheel fastener tightening. With the wheel removed and the rotor secured to the hub with at least three fasteners, set up a dial indicator that contacts the rotor disc surface. Preload the indicator and then adjust the needle to the zero mark. Slowly rotate the rotors while observing the dial. If lateral runout exceeds the manufacturer specs, perhaps by about 0.002" to 0.003", the rotor should be either replaced or resurfaced with an on-car brake lathe. Before replacing or machining, place a witness mark (rotor to hub) and move the rotor to a different clock position and re-check runout, as you may have a stack-up of lateral runout tolerance between the hub and rotor. If you do find the ”sweet spot,” be sure to mark this for future service reference.
Wheel Bearings
A shimmy condition may be caused by worn or improperly installed wheel bearings. A front wheel bearing issue will affect front wheel alignment, making it impossible to properly set toe angle. Checking wheel bearing condition should be one of the routine checks made prior to alignment. Bear in mind that some inexpensive wheel bearings may not provide durable material/construction and may lead to lateral runout. Always select high quality bearings offered by established manufacturers.
Shaky Shift Lever
If you or the customer feels a vibration at the shifter (assuming a mechanically-operated shifter), the vibration is likely generated by engine torque fluctuations or crank/rod/piston imbalance. This type of vibration may be amplified by imbalance in the driveshaft or shaft joint angle on a FWD vehicle.
Unless the engine has been previously rebuilt — where a rotating assembly imbalance might be suspected — check the engine and transmission mounting for overall alignment, contact or looseness at mounting points. Check for condition of any rubber mounts that could be deteriorated due to age and/or oil leaks.
Throttle Pedal Vibrations
A vibration may be felt at the accelerator pedal. This vibration may occur at various engine speeds, regardless of vehicle speed. The vibration may disappear when the engine reaches a certain rpm, and may go away when the transmission is in neutral.
Pinpoint diagnosis includes inspection of the engine running condition at the rpm recorded during verification; idle quality (both normal and under load); fast idle quality both normal and under load; and cruise rpm. Pinpoint inspection also includes checking the engine, transmission, and accessories for contact with the body; throttle lever and accelerator cables; and the accelerator pedal itself (for play, looseness, and the mass damper, if so equipped).
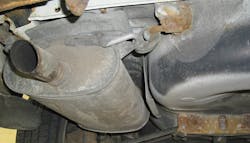
Torque fluctuations are transmitted to the body through a range of potential sources. Inspect the exhaust system both when cold and when hot since pipes will expand and contract with temperature changes. Check all rubber isolator bushing mounts. Sometimes complaints can be resolved by loosening the entire system to relax the tension, and retightening. Check for exhaust system components that may be contacting the body, and check the condition of any heatshields (at mufflers or catalytic converters), as loose or corroded shields can easily create an issue.
Engine Vibrations
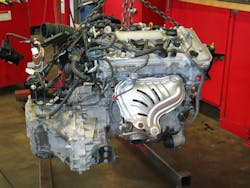
Engine vibrations may be caused by any of several possibilities, including worn, broken engine or transmission mounts, misfires (injector issues, ignition systems) or an imbalance condition relative to the crankshaft, connecting rods, pistons, harmonic damper or flywheel. If the engine has not been rebuilt, chances are that a rotating assembly imbalance is not the culprit. If the engine has been rebuilt, it is possible that the crankshaft has not been balanced correctly. For instance, it's possible pistons of a different weight have been installed and the crank has not been re-balanced to compensate for this.
A “first order” engine vibration is associated with the rotational force or torque. It is usually associated with imbalance or runout conditions such as in a flywheel, torque converter, or harmonic balancer.
Driveshaft/Driveline Vibration
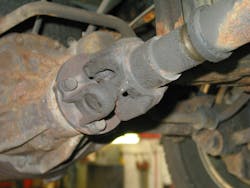
Driveline vibrations can be caused by imbalance, runout or U-joint condition. The force from a driveline imbalance or runout will usually cause a first order vibration because it occurs once per revolution of the shaft. Driveline complaints relating to U-joints are caused by phase, joint condition and/or working angle (inclination). As a U-joint rotates, it accelerates and decelerates twice per revolution. As a result, U-joint issues will generate second order vibrations.
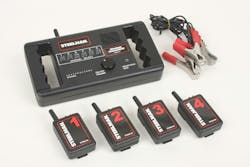
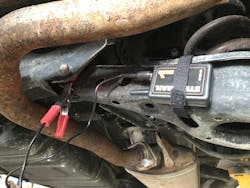
If you have access to a NVH analyzer, you can isolate and determine tire/wheel frequency. Once you know tire/wheel frequency, you can easily determine driveshaft frequency. The driveshaft on a rear-wheel drive or all-wheel drive vehicle drives the rear wheels through the rear axle. In order to determine driveshaft frequency, you can multiply tire/wheel frequency by the ratio of the rear axle.
Let’s say the vehicle has a vibration issue at 45 mph and a rear axle ratio of 3.08:1.
Multiply the tire/wheel frequency of (for example 7 Hz) with the rear axle ratio of 3.43:1. This results in a driveshaft frequency of 24 Hz at a vehicle speed of 45 mph.
It is important to remember the difference between driveshaft and halfshaft frequencies. Driveshaft concerns are of a high frequency since the driveshaft rotates approximately three times the speed of the tire and wheel assemblies. Halfshaft concerns occur at a low frequency because they turn at the same speed as the wheel and tire.
Halfshafts are shorter and smaller in diameter, and therefore less susceptible to vibration.
Engine Noise
Engine noise, depending on the type of noise and location, can be of minimal or extreme concern. The concern may be as simple as a slipping belt, an exhaust leak at the exhaust manifold, a vacuum whistling noise, valvetrain clatter or the dreaded deep knocking sound that may indicate a bad rod bearing.
A mechanic’s stethoscope can be invaluable for isolating a noise concern. Other techniques such as removing a plug wire and grounding it, or disconnecting an injector can help identify the location of an internal engine noise. By changing the firing load in a cylinder, noises from a piston, piston pin or rod bearing condition may change, identifying a cylinder causing the complaint. Excessive valvetrain noise may be due to sticking camshaft actuators, stuck hydraulic lifters, or insufficient oil. Check oil level, and drain the oil to check condition. If you suspect an oiling problem, removing the engine oil pan will allow you to inspect for sludge buildup, a contaminated oil pickup, etc.
If the engine features multiple accessory drive belts, this can be diagnosed by removing the belts one at a time until the condition changes. Accessories associated with the belt and the condition of the belt should be checked, such as the alternator, water pump, A/C compressor, idler pulley and power steering pump.
Quite often, a noise may be caused by an improperly installed air cleaner and air intake ducting. Before spending time to perform a deep diagnosis, check the simple areas first.
Harshness
A harshness complaint involves the customer’s concern relative to the “ride” quality. This may depend on the specific vehicle (a luxury vehicle may provide a smooth ride, while a sports car that has a stiff suspension may transmit road irregularities felt by the driver). However, a harshness complaint that has developed over time may involve any of a number of suspension-related issues, including worn or seized shock absorbers/struts, broken springs, deteriorated/damaged suspension bushings, over-inflated tires, etc.
Phasing/Beating
Beating or phasing occurs when two similar vibrations (or sounds) with slightly different frequencies may exist in the same area or vehicle. This is referred to as phasing. During long-term operation, the phase of the two waves will change due to a small difference in frequencies. The two higher points can overlap and increase the level or amplitude, and sometimes the two low points overlap, reducing the level or amplitude.
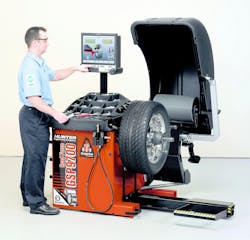
As this change in intensity or amplitude takes place repeatedly at a constant vehicle speed, the wave phase can change as time progresses. The wave that results can create a “beating” sound. This can occur if the vehicle has more than one wheel/tire assembly out of balance. This issue can be corrected by eliminating either one of the vibrations. By balancing one of the wheel/tire assemblies, you eliminate the beating noise. Obviously, balancing both will eliminate both the beating and the vibration.
About the Author
Mike Mavrigian
Motor Age Editor
Mike Mavrigian has written thousands of automotive technical magazine articles involving a variety of specialties, from engine building to wheel alignment, and has authored more than a dozen books that crisscross the automotive spectrum. Mike operates Birchwood Automotive, an Ohio shop that builds custom engines and performs vintage vehicle restorations. The shop also features a professional photo studio to document projects and to create images for articles and books.
