What to do when your ADAS system will not calibrate
My shop has been performing ADAS calibrations since January 2019 and as a result, has performed thousands of ADAS calibrations on vehicles. Our main customers for this work are local body shops and glass shops. As the systems become more and more common, we are seeing an increase in required calibrations after vehicles have been involved in a collision. The interesting part of this, not only have the ADAS calibrations driven vehicle repairs to the shop, but it has led to us doing a variety of other repairs for the body shops from suspension work, electrical repairs, alignments, and noise concerns. All told that portion of our business now accounts for one-third of our overall business. This area of work is going to become more and more prevalent.
One of the things that still surprises me, is the lack of understanding of when vehicles require calibrations. The mainstream body shops are very good at knowing when, but the independent body shops will typically only calibrate when there are indicator lights on the dash. When I first started performing calibrations, I had gone around to all the local body shops to promote our ADAS business. One local body shop said that he was "not interested" and that what I was promoting was "insurance fraud.” I asked him politely why he thought that, and his reply was that "all the systems are self-calibrating.” Yes, some of your blind spot systems are self-calibrating, but that is the exception rather than the rule. One thing we have come to understand is that high-production body shops may have an assembly line, so to speak, for the vehicles in the shop. What I mean by this, is that one technician will disassemble the vehicle and then another one will perform the repairs. This is great for production, but this is where things can be missed or not conveyed properly.
We have gotten vehicles from both the body shops and the glass shops that would not calibrate. The problems can range from a sensor bracket being bent to fish eye distortions in the windshield. We have had bad radar sensors that showed obvious signs of impact damage that were not replaced at the time of the body repair. It is quite common for us to ask if the sensor was replaced at the time of the repair, and more than once we are told, “Of course it was.” It later comes out that the new sensor was on the technician’s toolbox or that it was a different car that they were thinking of.
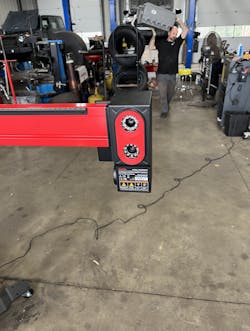
So, when it comes time for the calibration, the measurements obviously are critical to correct target placement whether it be radar or camera-based systems. Our tool of choice is the Autel IA900 (Figure 1). The main reason for this is the Autel IA900 is a camera-based ADAS frame (Figure 2).
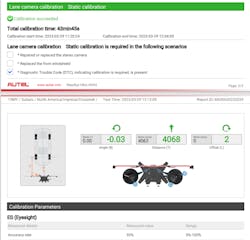
This guarantees the correct placement of the frame every time and takes the potential for human error out of the equation. I have watched my guys spend way too much time on a calibration because they were questioning their measurements. Also, by having the cameras, it prints the measurements on the post-scan for documentation (Figure 3).
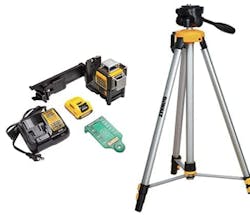
Some of the other tools that we use to perform calibrations include the DeWalt 3-Axis Laser Level. (Figure 4) We use this mostly for finding the center line of the vehicle and also for the placement of targets.
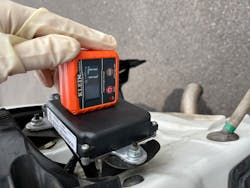
One of our favorite tools is the Klein Tools Digital Angle Gauge (Figure 5). It is used in both calibrating and diagnostics. The other day we got a Subaru in for the left rear blind spot sensor not calibrating. Interestingly enough it was a right rear hit. A quick visual inspection of the vehicle showed a noticeable difference between the left and right sensors. We checked and sure enough, the left sensor was over one degree different than the right sensor. We ordered a replacement bracket and performed the calibration.
Diagnosing ADAS is no different than diagnosing a check engine light. ADAS really can be generalized into two types of sensors. They are either camera-based or distance-based. To be specific, with the distance sensors you have several types that include ultrasonic, sonar, radar, and lidar. Diagnostics will be the same basic diagnostics for all the systems, just different targets. We have a repeatable strategy-based diagnostic process that we use. First, we verify the problem and make sure we know the history of the vehicle. I make it very clear to my customers and technicians that if we can’t duplicate the problem, do not waste your time on it. Yes, the vehicle has a problem, but if we can’t duplicate it, we are just wasting our time. Once we have duplicated the problem, we will perform a visual inspection of the vehicle to see if there is anything obvious. Our next step is to perform a vehicle-wide scan of the vehicle's network. Once we have a printout for the record, we will consult Identifix for known problems and technical service bulletins (Figure 6). Depending on the concern, we may also consult OE service information. If we have a communication issue with a sensor, we will go directly to that sensor to inspect it to make sure that it is first plugged in and to see if there is any visible damage.
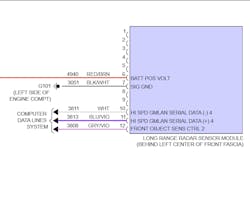
Most of your ADAS sensors are simple circuits and have either six or eight wires (Figure 7). As with any other sensor test, start with testing for power and ground. If that is good, then move on to testing the network communication. Keep in mind you are going to need an oscilloscope to see if the network is communicating. However, if the network is communicating and you have power and ground, then simply put, you have a bad sensor. Sensors can be expensive. Most are around $1,000, but we ran into a radar sensor on an Acura that was $7,000.
When it comes to ADAS sensor replacement, some of the sensors are plug and play and some of the sensors have to be coded/programmed and will also require a calibration. Audi for example, requires location protection to be removed, then programmed, and finally calibrated. Follow the OE service information for the vehicle that you are working on. Each manufacturer is different in their recommended repair procedures. Unfortunately, the manufacturers have not standardized where they locate the information, so it can be frustrating locating the correct procedure. Keep in mind, you may have to buy a subscription to the manufacturer to get access to the specifics of the sensor replacement. As far as aftermarket information services, I have found ALLDATA Collision to be excellent with the ADAS.
Some common things to look for when dealing with ADAS repairs include knowing that the front and rear parking sensors are networked to reduce wiring and are location specific. Typically, the outside sensor is a different part number than the inner sensor. It is very common for body shops to switch the sensor locations and as a result, the system will not work. The most common problem with radar sensors is either not having been replaced after an accident or the mount was not replaced. Camera problems are typically a distortion in the glass or bad frame placement on the glass. We had one camera fail calibration because of an 8-1/2” x 11” repair sticker placed on the lower left portion of the windshield. The interesting part of that car was that we have done dozens of cars with that same sticker attached with no problem. Keep in mind the front radar sensor and the forward-looking camera are very closely linked so if there is a problem with one the other will be affected. As far as rear blind spot sensors go, the most common problems include the sensor not being replaced and the mounting frames being bent. You'll also want to check the body surface for distortion under the mounts. We have had a few body shops not properly repair the panel behind the sensor and this will not allow the sensor to calibrate.
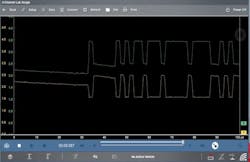
In closing, to be a full-service ADAS shop you are going to need additional tooling and service information. You will need to be proficient at reading and understanding wiring diagrams for diagnostic purposes. The use of an oscilloscope is mandatory for looking at the network (Figure 8). All of your ADAS systems are exchanging so much data, that they have to have a high-speed network to accomplish this. I recently attended a scope class where there were approximately 50 technicians. Most of the scopes still had their leads wrapped up from when they were purchased new. Do yourself a favor and make a point to work with your scope, this way you will be confident in making a diagnostic decision from the information provided by your scope. Take some time to look at different network types so you know what they look like and how to set up your scope.
