As we approach the fall and winter season, where jump-starting instances increase considerably, we thought that now is a great time to revisit the key things to remember for effective jump starting while also reminding everyone about the importance of safety. Following these steps will ensure that you achieve your desired result and keep yourself safe in the process.
- Is your jump starter charged? Trying to jump a dead battery with another dead battery will result in a lot of frustration. Make sure that your jump starter is at or near full charge before beginning the jump starting process. If you often forget to charge your jump starter, you can sign up to receive a quarterly recharge reminder here.
- Is your jump starter in proper condition? Perform a visual review of your jump starter. Make sure that the output leads aren’t frayed, that the clamps are in proper working condition, that the unit’s case is not damaged or swelled (a sign of a compromised battery). This simple check can save you much frustration as well as prevent you from putting a dangerous product into use.
- What is the voltage of the vehicle/system you are trying to jump-start? It is critical, both for the success of the jump-starting effort and for your safety, that you fully understand the vehicle/system you are jump-starting as it pertains to voltage. Failure to properly match jump starter and system voltage can result in very dangerous conditions.
Key steps for safe, effective jump-starting
1. Always wear protective gear
This includes protective eyewear when working around vehicle starting batteries. Also, never wear rings or other metal items when working around vehicle starting batteries, as they could cause a short if contacted with the battery, which could cause serious injury.
2. Review the potential cause for the no start condition
Was there a drain left on that caused the starting battery to be depleted, such as a light or other load? If so, address that cause and give the battery several minutes to recover prior to attempting a jump start.
3. Make sure that your jump starter (if it can service multiple voltages) is configured properly
To jump start a vehicle/system that needs 12V, be sure your jump starter is set to 12V.
WARNING: Remember that your jump starter leads are connected to a live battery! Always take care to ensure that you avoid incidental contact with the vehicle or with the opposite lead, both of which could short the jump starter and result in personal injury.
4. Establish your vehicle connection
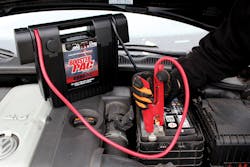
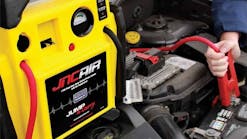
First connect the Positive (red, +) clamp to the vehicle’s positive battery terminal or alternate starting point (as recommended by the vehicle’s manufacturer), and always take care to prevent allowing the leads to get in the path of any moving engine parts. Then, when making the positive connection, it is a good practice to rock the clamp on the terminal to penetrate any corrosion that may be present on the terminal.
5. Complete your vehicle connection
Connect the Negative clamp (black, -) to a proper vehicle ground (an unpainted heavy metal connection, such as the vehicle frame or an engine ground). Never connect to the carburetor, fuel lines, sheet metal, painted surfaces, or any moving part – it really should be to a vehicle frame ground, engine ground, or manufacturer-specified ground starting point.
6. ON/OFF switch
If your jump starter is equipped with an ON/OFF switch, now is the time to turn it to the ON position.
7. Position yourself
All participants should now be positioned away from the vehicle battery and jump starter. Once this is the case, attempt to start the vehicle. Hopefully, the vehicle will start right away. If not, remember, every jump starter has a duty cycle. After 3 seconds of cranking, if the vehicle doesn’t start, stop. Wait 2-3 minutes and attempt the start again. Also, remember that the problem may not be the battery – there could be another reason why the vehicle won’t start and a jump starter will not solve those problems.
8. Once the vehicle is started, begin the disconnect process
First disconnect the Negative (black, -) clamp from the vehicle ground, remembering that you are connected to a live battery and care should be taken not to allow the clamp to touch the vehicle or the positive lead once it is removed from the vehicle ground. Properly secure the Negative clamp to the unit.
9. ON/OFF switch (again)
If your jump starter is equipped with an ON/OFF switch, now is the time to turn it to the OFF position.
10. Disconnect the positive clamp
Disconnect the Positive (red, +) clamp from the vehicle’s positive battery terminal or alternate starting point. Properly secure the Positive clamp to the unit.
11. Check the jump start for corrosion
Once the jump-starting process is finished, check the jump starter for corrosion that may have transferred to the clamps or other wear and tear to be addressed before putting it away. Corrosion can be wiped off the clamps with a shop towel to avoid rust, discoloration, or other deterioration. Also, the unit can be cleaned with a warm cloth if necessary.
12. Charge the jump starter
Finally, charge the unit prior to storage. Keeping your unit fully charged is the best way to get a long life from it. Storing the unit in a discharged state for a long period of time will reduce battery life.
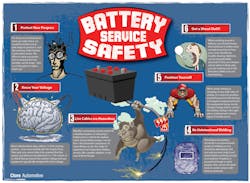
We have created a small graphic that covers most of these important steps below. If you are using jump starters in a commercial environment, this graphic is great to hang in break rooms or work areas to remind personnel of the importance of safety when working on or around vehicle batteries.
Information provided by Clore Automotive


