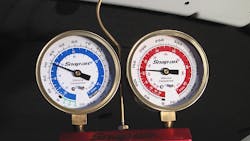
Evaluating the performance of an air conditioning system is not a difficult task, especially when in the hotter climates. The A/C system is tasked with transferring heat energy out of the hot cabin and out to the atmosphere. It’s typically quite obvious to both consumer and technician, when the A/C isn’t performing properly. But, how do you test the A/C system in your shop in December, in Michigan or anywhere else it's winter and cold? The answer? We'll get to it shortly.
As with any article or other automotive technical training, there is no perfect, “works every time it's tried” method of repairing cars. What we go for are procedures that work as close to “nearly all the time they are used,” as possible. This is one of those procedures, based on my training and my experience that works nearly every time it is tried.
As a technician who spent his career in Michigan, I can say that we did very little A/C work in December. At one point in my career, I worked in a Toyota store, and most of the work I did was installing A/C systems in new cars. Otherwise, it wasn't until sometime in spring when the temperature and humidity went up and people turned their systems on, and nothing happened. A frantic call to the service department and the first available appointment later and I was doing A/C work.
The real question to answer is not: "How do you test in December?" The real question is: "How do you test an A/C system?" And “How did I know that the newly installed A/C system worked correctly?
As a Ford trainer and a college teacher teaching A/C systems, how could I teach A/C diagnosis? How could I demonstrate it? How could I know the techs/students had learned how to test the system and be confident that the techniques would work when called upon, when evaluating A/C in the winter? How do you test an A/C system, in December? These answers are coming.
Let's start by answering just the first question. How do you test an A/C system? If you're an old-school tech like me, you were likely taught that you open the hood, connect the gauge set, fire up the engine, set engine rpm to 1500, A/C controls set to max-cold and max-fan, doors open and check the pressures. While there certainly were and may still be some cars that require you to do that, many today don't work that way. Plus, there are other steps that you will want to do before you even think about connecting your gauge set or recycle machine up to the vehicle.
Let's review a good procedure for any time you test the A/C system, starting with the legal requirements. In my most recent review of Federal Section 609 requirements for motor vehicle HVAC technicians, the first requirement when performing A/C work for consideration is to be Section 609 Certified. "For consideration" means that you are receiving some form of compensation for doing the work. As long as you have been 609 certified you may legally work on R-12, R-134a, EPA SNAP refrigerants and R-1234yf for consideration. The EPA is requesting that techs re-certify for R-1234yf but are not requiring it at this point. You may also purchase refrigerants in larger containers. Be aware the federal regulations do not require that you do leak repair. They advise it. There are some states and cities that do require leak repair. You will also want to keep in mind that certain vehicles with R-1234yf may be regulated under OBD II emissions. Manufacturers have been given emission credits for using R-1234yf. Modifying those vehicles A/C systems may fall under emissions tampering.
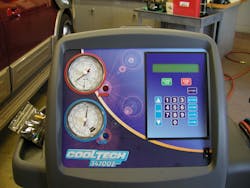
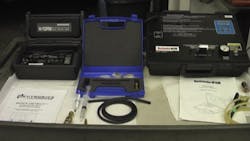
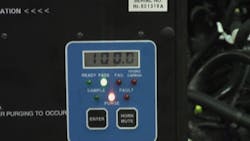
Federal regulations also require that for each type of refrigerant that you service in your shop you must have a unique and dedicated recovery-recycle machine. The exception to that is a recovery mechanism that is only used to recover contaminated refrigerant. You will also want to have a refrigerant identifier, leak detector, and sealant detector that you use before connecting your gauges to the vehicle (Figures 1, 2).
At one point in time, many manufacturers recommended that if you found sealant in the system that you button it up and give it back to the owner. The only repair at that time was the complete replacement of the entire A/C system. Compressor, lines, receiver-dryer or accumulator, heat exchangers. I was recently talking with a sales rep from one of the large parts house chains, he was explaining that they sold a device that attached to your machine and would strain the sealant out during evacuation, protecting your machine from damage. You will want to investigate the availability and efficacy of those items.
The EPA has indeed identified certain refrigerants that you may use in place of R-12 or R-134a, these are SNAP refrigerants, Significant New Alternative Policy. If another shop installed one of those refrigerants it should be tagged under the hood and have fittings that are different than those for either R-12 or R-134a. This also means that your equipment may not be able to connect to the system.
Let's get back to how to test the A/C system of that car sitting in your stall regardless of the month and ambient conditions:
1. Look up the test procedure in service publications. I'll explain why that is critical in just a moment. Check for TSBs and other possible pattern failures during this check.
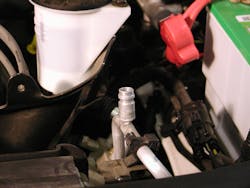
| A good visual inspection can find many problems. This missing cap represents a leak of about one-quarter pound of refrigerant a year. Always make sure the caps are on and secure. |
2. Agood visual inspection, are there any obvious leaks? Are the service port caps on and tight? Any new components installed? Wires disconnected? (Figures 3a, 3b)
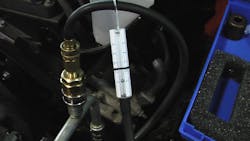
3. Test for sealant in the refrigerant system. If found, follow the procedure that your shop has for systems that are contaminated with sealant (Figure 4).
4. If no sealant is found, connect an identifier and check for what refrigerant and other possible contaminants may be in the system (Figure 5).
Getting back to the EPA and regulations here. If you found that the system contains two or more refrigerants, consider it to be contaminated. Again, your shop should have a procedure based on Federal and local regulations of what to do next.
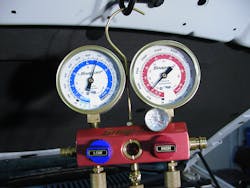
5. If you have gotten past the first three, is to connect your gauges-machine and note static pressures. There is a direct temperature-pressure relationship with all refrigerants and you will want to note this on the RO (Figure 6).
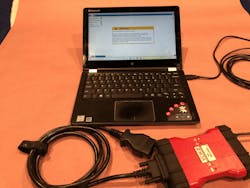
6. Connect a scan tool and see if there are any DTCs from the HVAC system or PCM that may be keeping the system from operating. Certain performance issues will keep the PCM from turning the A/C compressor on (Figure 7).
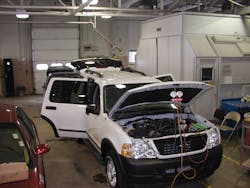
7. Using service publications prepare the vehicle for testing. Prepping the vehicle is critical to being able to test and use the test results to analyze possible concerns (Figure 8).
8. Run a performance test, as described in service publications, on the system, and note the pressures as well as ambient temperature and humidity.
Note: These two steps are why you check service publications early in the process to find out test procedures, any TSBs, system operating strategy, and specifications.
9. Compare your results to the tables in the service manual (Figure 9).
10. Based on the tables determines if the refrigerant system is working as designed.
You're saying, "Wait, this seems like the process I use in the summer." Give me a minute to finish the process and I'll explain the differences for cold-weather testing. I always like to baseline my training so everyone is on the same foundation. That way, what I say will make sense to all.
11. Make repairs as necessary and rerun the performance test to confirm repairs.
By now I am sure that most of you have figured out the answer to the question of testing in cold weather. The way you test an A/C system in December is the same way you test the A/C system in every other month of the year: by the book. As a Ford trainer and as faculty in Ferris State University's Automotive Program, I often had to teach A/C classes in November, December, January, February and March in Michigan. It is often quite cold in those months, yet I never had difficulty in teaching this subject for those techs and students. The Performance Test, FOLLOWING SERVICE MANUAL PROCEDURES, (sorry to yell) is the key to the process.
As you probably know, when the ambient temperature is below 32 degrees the system won't turn on. Therefore you must do all testing inside a heated building. Another typical operating characteristic is that when placed in defrost mode the HVAC system will usually engage the compressor even when the temperature setting is calling for heat. This is done to provide dry air to help defog the windshield. My caveat to, “will this work every time?” When you have high-temperature extremes, you may have trouble reproducing a concern. Let me explain that with an actual example. Ford introduced the Flex in the late Summer of 2008. The first TSB on that car was 08-20-5 about poor A/C performance in ambient temperatures above 100 degrees. This TSB directed the techs to evacuate the system and recharge with a specific amount of refrigerant. It also required a recalibration of the PCM. Let me translate that for you to be very clear. You cannot fix that car without access to service publications and a scan tool and/or J2534 pass through.
I digress, back to Step 8; the performance test is designed to find refrigeration system concerns and is based on the reality that for any given temperature and humidity level a properly charged, correctly operating system will have defined pressure readings. If something is not right (airflow across a heat exchanger, the flow of refrigerant in the system, and passing the restriction, or lack of one), all of these concerns create an effect on pressure readings. These defined readings will tell you, based on the charts, what is the likely concern. You can trust these charts if you've done the performance test as required by the OE in service publications.
During hands-on training, I would create bugged vehicles that the technician or student had to analyze for the likely/correct fault. I would simulate airflow issues by placing obstructions in between the condenser and radiator, faults in cooling fans, even faults in engine sensors for them to find. Using the performance test results and the associated charts in service publications the testing procedure would find them or put them on the right course to find them, every time. I mentioned that sensors that can cause problems. One of the first cars I owned with automatic temperature control was a Pontiac Bonneville SSE. One of the primary sensors for the control of the system was the ambient temperature sensor, in front of the condenser, behind the grille. In those days when I would be out shopping with my wife, I would sometimes wait in the car while she ran in to pick up whatever it was she was after. One time it was a day in December, the ambient temperature was about 32 degrees and with the inside temp set to 70. At first, everything was fine. After about 10 minutes I noticed the air blowing out was getting colder and colder, and I heard the A/C clutch engage. What was going on? I looked down at the controls and noticed that the outside air temp was reading was 110 degrees. The ambient temp sensor was close to the radiator and not in a position to have outside air blowing over it while parked. It was reading under hood temperature. Added to that was a sunny day so between the sun load sensor and the ambient sensor the system "thought" it was hot outside and turned the A/C on to meet the request for an inside temperature of 70 degrees. Today, most automatic systems have a strategy built in to ignore the ambient sensor when the vehicle is standing still.
For approximately the last 30 years, the A/C systems (both manual and automatic systems) have an HVAC module in communication with the Powertrain Control Module to control compressor and cooling fan operation. Look at this list of requirements for the PCM to engage the A/C compressor on a late model Ford Expedition:
When an A/C request is received by the PCM, the A/C clutch relay is engaged when all of the following conditions are met:
• Excessively high or low refrigerant pressure from the A/C pressure transducer is not detected.
• Ambient air temperature is above approximately 0°C (32.0°F).
• Evaporator temperature is above approximately 1°C (33.8°F).
• Engine coolant temperature conditions are within normal parameters.
• Wide Open Throttle (WOT) condition is not present.
• Engine torque conditions are within normal parameters.
• Battery state of charge conditions is within normal parameters.
On this vehicle there is communication across three networks and between four ECUs, just to turn the compressor on!
In this article I have focused on just testing the refrigeration part of the AC system. Electronic controls and the possible concerns that may be caused by skewed sensors, faulty programming, and drivability issues are each worth their own articles. As you work on vehicles (and I cannot emphasize enough), the importance of understanding how the system works, and using service publications to direct your steps as you analyze whether or not the system is working like it is designed, is extremely high.
How do you test the A/C system in any weather, anywhere? Follow the OEs service procedure, be ready to fix seemingly unrelated concerns, and for refrigerant concerns, rely on the performance test.
