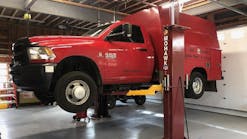
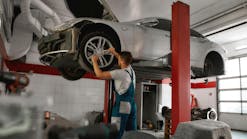
We all know that a clean facility is better than a dirty one. Clean facilities generate more repeat traffic as well as providing a safer working environment. We also know that very few of us enjoy cleaning. We tend to put it off as long as we can and then complain about how hard it was to clean. By following Oil Eater's "Clean as You Go" procedures, your floor will always be relatively clean, your customers will see a neat and polished facility & you will reduce the amount of water, chemical & labor needed to maintain your shop's floors.
"Clean as You Go" simply REQUIRES employees to be responsible for their own drips & spills as they occur. "We don't have time" is not an excuse. Taking the few seconds to do this will save hours a month while limiting the possibility of these soils being tracked through your shop or onto your customer's vehicle. Having a clean facility and presenting a customer with a staff well trained in shop maintenance will drive customers back to your facility. If you are following "Clean As You Go" at your facility, floor mopping should only need to be done once or twice a day, usually at the end of each shift.
Equipment needed: (All equipment should be clean to start every day)
- Broom.
- Dustpan.
- Putty Knife.
- Shop rags.
- Mops. Using a linen service to rent your shop towels & mops from will ensure clean products. Most mat rental companies also provide this service for shop towels & mops.
- Wet Floor Signs.
- A spill kit, such as the Oil Eater Spill Kit.
- Universal absorbents, such as Oil Eater Universal Absorbents.
In high traffic areas an Oil Eater Tuff Rug will prevent tracking of oil and dirt while providing the tech a slip free surface to work on.
- Mop Handles.
- Mop Bucket and Wringer.
A double bucket system works great. This has a second compartment to collect dirty solution when you wring out the mop, keeping your cleaning solution from being contaminated.
- Properly labeled spray bottles filled with an 8 to 10 parts water to 1 part Oil Eater solution.
- Oil Eater Cleaner/Degreaser or Oil Eater Pouch Packs.
Floor Cleaning Do's & Don'ts
Do:
- Provide all employees with clean shop towels at the start of their shift.
- Clean up drips and spills immediately to prevent tracking thru your shop.
- Put the minimum amount of solution needed in the mop bucket.
- Change your solution after mopping each bay.
- Hang mops when not in use.
- Empty and clean mop buckets after each use.
Don't:
- Leave mop buckets filled with dirty solution.
- Leave the mop in the mop bucket in the dirty solution.
- Leave drips and spills for clean up later, or the next person.
How to's
How to dilute
When diluting chemicals with water, the lower number always (unless otherwise stated) represents the concentrated chemical and the higher number the volume of water into which it is to be mixed.
Basic volume breakdown of a gallon. One gallon equals 4 quarts = 8 pints = 16 (8oz.) cups = 128 ounces (oz.).
Divide using the ratio:
- 1 to 4 would be 128 divided by 4, 128/4 or 32 oz. One quart (32 oz.) of Oil Eater is added to 4 quarts (128 oz.) of water.
- 1 to 8 would be 128 divided by 8, 128/8 or 16 oz. One pint (16 oz) of Oil Eater is added to 4 quarts (128 oz) of water.
- 1 to 32 would be 128 divided by 32, 128/32 or 4 oz. 1/ cup (4 oz) of Oil Eater is added to 4 quarts (128 oz) of water.
Floor Mopping Procedure
- Prep the area to be mopped.
- Place "wet floor" sign to alert coworkers.
- Move any equipment or furniture to a safe area where they will not be in the way and can be easily put back in place.
- Use your putty knife to remove any stuff like tar or gum stuck to the floor.
- Sweep the area.
- Mop the area.
- Use a solution of 8 to 10 parts water to one part Oil Eater.
- Dip you mop in he solution & wring it out so it is damp. The biggest problem when cleaning is over wetting the surface. A damp mop will allow the oil & dirt to cling to the mop, versus just spreading in around.
- Start in the corner the farthest away from where you will finish.
- Mop in an "S" or figure 8 motion working back from where you started. Redip your mop in the solution & wring it out frequently.
- Change the solution after mopping each bay.
- Clean up.
- Empty and rinse the mop bucket so it will be ready for the next shift.
- Rinse mop completely and hang.
- Remove wet floor signs.
- Put equipment and furniture back in place.
If you are following "Clean As You Go" at your facility, floor mopping should only need to be done once or twice a day, usually at the end of each shift.

