Vehicles Affected: All
Tools Used:
- Vehicle Information
- Scan Tool
- JS Products Steelman EngineEAR Stethoscope
- JS Products Steelman Wireless ChassisEAR Diagnostic Device Kit
- Ultrasonic Leak Detector
- Diagnostic Smoke Tester
Noise, vibration, harshness (NVH) issues can be time-consuming to diagnose. This is mainly because noise and vibrations can use the vehicle’s structure (chassis) as an antenna to transmit the noise throughout the vehicle, making it difficult to pinpoint the exact cause of a noise.
Additionally, noises can be caused by worn components in just about any system or by wind passing over or through the vehicle. Let’s start off by explaining different types of noises and their possible causes, then we will discuss the best tools to use to find the source of a noise.
As always, use your vehicle information source to determine if there are any technical service bulletins (TSBs) related to the issue the vehicle is having. You should also be aware that there are some excellent diagnostic procedures available for isolating and locating noise or vibration issues on a vehicle in ALLDATA’s information database.
Growling or howling noises
Typically, a growling noise is caused by a worn bearing. If the noise occurs when the engine is running and the vehicle is stationary, it is due to an engine-driven component. The noise level may be constant or change with engine speed. Engine-driven components include water and power steering pumps, belt idlers and tensioners (including timing belt components), alternators, and air conditioning compressors. Some of these parts can be isolated by turning them off or removing a belt to determine if the noise is eliminated. In other cases, an electronic stethoscope, such as the Steelman EngineEAR, can be used to locate the source of the noise.
Use the stethoscope to listen to individual components in order to isolate the noise. The EngineEAR has the capability of adjusting the volume of the microphone. This feature, coupled with its noise reduction headphones and superb microphone, makes it much easier to identify specific noises.
If the growling noise is not present with the vehicle stationary, then the noise can become a little more difficult to locate. Rotational noises that are present with vehicle movement can be caused by bearings in the transmission, axles, hubs, or differential. These noises can also be caused by worn gears in the transmission or differential, worn or mismatched tires, or even wheel or axle alignment problems. Isolating these noises can be difficult because noises can carry through to other components and many noises sound the same.
One thing that causes a technician to spend a lot of time with diagnosing noises is the time it takes to road test the vehicle in certain conditions to duplicate the noise. In many cases, a technician will need to drive the vehicle at a specific speed in order for the noise to be present. If a change is made to the vehicle, such as rotating the tires, in order to see if the noise changes, the road test must be performed again. Noises can also be difficult to locate because they may sound like they are coming from the rear of the vehicle when you sit in the front and the front of the vehicle when you sit in the rear.
At this point, I should remind you when driving a vehicle, in order to diagnose anything, including noises, safety should be your number one concern. Utilizing a helper to drive the vehicle enables the technician to both listen for the noise and to operate any tools or equipment safely.
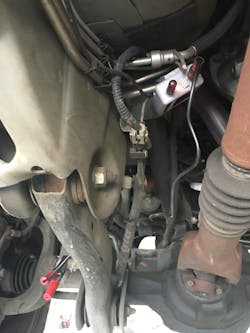
The best way to help limit the number of road tests is to detect the specific location of the noise. Our go-to tool to isolate the cause of noises is the Steelman ChassisEAR. We use the wireless model which utilizes a series of wireless microphone/transmitters that connect to the vehicle. These transmitters then allow the technician to listen to each signal either collectively or individually to determine the location of the noise. By understanding the location of the noise, it is much easier to determine the cause, thereby reducing the number of road tests to find the source of a noise.
Transmitters can be placed on each corner of the vehicle allowing the technician to narrow down the area of the noise. For instance, place a transmitter on each front and rear strut or shock mount. If the noise is only detected by the rear transmitters, place a transmitter on each side of the rear axle housing, the transmission output housing, and the center of the differential. You are now able to determine by the location of the noise if it is caused by the transmission, differential, or by which axle bearing. If the noise is the same from each transmitter, it could be caused by a tire that is mismatched, worn, or has an aggressive tread design.
Whistle or wind noises
Wind noises may be caused by many factors, including window or door seal leaks, body seam leaks, or even external components such as roof racks or windshield wiper arms deflecting air across the body.
The first step in locating a wind noise is to obtain specific information from your customer about when the noise occurs. Many wind-related noises only occur at specific road speeds or conditions and may include factors such as whether the A/C is on or off. Second, perform a complete visual inspection of the vehicle. Look for loose or misaligned body or door panels, loose window seals, or obvious body damage. If nothing is noted with a visual inspection check your vehicle information source to see if there are any TSBs related to the noise complaint.
A road test will need to be performed to duplicate the noise. You must pay particular attention to even the smallest details and be prepared to make changes to the vehicle as you drive. Once you hear the noise, try making changes to the vehicle and listen for changes to the noise. Changes that can be made that may affect noise include blower fan speed, vehicle speed, opening a window, or taping off openings in the body or firewall.
If the noise does not change when either the fan speed changes or the window is opened, the cause of the noise is most likely due to a misaligned or deformed body panel or even a roof rack cross bar that is causing air to create turbulence when passing by. Using the ChassisEAR may assist you in locating the source of the noise. It may also be useful to remove roof rack crossbars and observe components like wiper arms to see if there is movement while driving.
If the noise changes when air pressure within the vehicle changes, as with higher or lower fan speed or opening a window, then the noise is most likely caused by an air leak within the vehicle. One method to determine the source of an air leak is to install an ultrasonic leak detector transmitter inside the vehicle. Then, walk around the vehicle with the receiver, which will beep or flash a light when it detects a signal from the transmitter, allowing you to pinpoint the air leak.
Another method to locate air leaks is to use a diagnostic smoke machine. Place the vehicle in a bay with very little air movement. Roll up all the windows and close all the doors. Set the vehicle's blower fan to high, then walk around the vehicle with your smoke machine, blowing smoke at door and window seals. If you pass an area where the smoke is pushed away, there is air leaking at that point. This is caused by the positive air pressure in the vehicle (fan on and doors sealed) escaping to lower pressure outside the vehicle.
Over the years we have found many different noises - most of them caused by normal items such as tires, worn bearings in the engine, or drivetrain components. Some of the more difficult ones to detect only occurred during very specific conditions. Here are a few that come to mind.
- A 1980’s era full-size Chevrolet that made a scraping noise only when pulling into the customer's driveway. We found that their driveway was on a steep slope and you needed to make a fairly sharp turn to get into it. When the customer accelerated the vehicle to get up the slope, the motor mounts were worn just enough for the fan to scrape the fan shroud.
- Many vehicles that had motor mounts worn enough to cause exhaust components to rest on the body, which then would transmit engine noise throughout the cabin.
- A vehicle that had some air conditioning work performed, and then started making a humming noise off and on only when the defroster or A/C was on. We found the high side pressure hose was bent enough that the aluminum tubing was resting on the evaporator housing. When the compressor cycled, the pressure in the hose moved it further into the case, which caused the noise.
- A vehicle that made a sound like water rushing through a tunnel. We found that someone had removed the thermostat, which caused the water flowing through the heater core to move faster, making the noise.
- Numerous vehicles that have had noises or vibrations at idle caused by poor idle quality or speed. These were corrected by cleaning the throttle body and resetting idle adaptive strategies.
Some noises may be frustrating to isolate, and they can have some very interesting causes. But, with the right tools, they can also be very profitable to tackle.
Related tools for this repair
- The NVH Kit from Pico Technology works with PicoScopes to quickly identify the source of noise and vibration concerns.
- The Grainger Ultrasonic Leak Detector can artificially "sound pressurize" any enclosure or vessel to find leaks.
- The CPS Products Smoke Wizard GLD-40 combines pressure and vacuum style EVAP system leak detection capabilities and general purpose leak detector functions in a compact design that can fit inside your toolbox.
- The JS Products Steelman EngineEAR Stethoscope allows technicians to pinpoint noises and locate worn bearings and bushings, noisy valves and lifters, broken or worn gear teeth, faulty fuel injectors, wind or air leaks, and annoying squeaks and rattles.
About the Author

Barry Hoyland
Barry Hoyland has been in the independent aftermarket for more than 45 years as a technician, technician instructor, shop owner, and shop management consultant. He owned and operated a successful Southern California automotive repair center that offers complete auto care and specialized in emission and diagnostic services for over 28 years. Hoyland also owned a company that modified vehicles to perform as emergency response units and mobile command centers, incorporating high-end electronic components into today’s vehicles. Hoyland has experience with all size and types of vehicles including traditional gas, hybrid electric, alternative fuel, and heavy duty diesel trucks.
Hoyland has provided consulting services for many automotive shops, fleets, and government agencies in order to improve their operational efficiencies.
In addition, he has worked with many NHRA drag racing teams as a crew chief on supercharged alcohol and nitro-methane fueled cars and currently serves as a crew chief on a Top Alcohol Funny Car, a Nostalgia Funny Car, and a Nostalgia Alcohol Dragster
Hoyland holds certifications in ASE: A1, A6, A8, and L1, MACS 609, maintains a California Advanced Emission license, and a CDL with endorsements for double and triple trailers, tankers, and HazMat.
When he is not helping to run a shop in the Pacific Northwest, Hoyland travels across the U.S. as an instructor of technical and shop management courses, many of which he has developed.
