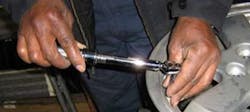
The process to remove a tire with a TPMS sensor
- Check the TPMS prior to any service work and record its operation. This will confirm sensor operation prior to work being performed and avoids the question of damage that may have been caused during disassembly/assembly. Record the sensor IDs with a TPMS tool or scanner if they are available.
- Remove the valve stem core to relieve the pressure.
- Remove the valve stem nut and push the TPMS sensor into the tire so it falls from the rim.
- Break the bead on the tire.
- Remove the first bead and STOP!
- Reach into the tire and remove the sensor from the tire before proceeding.
- Remove the second bead.
- Reinstall the sensor with a new grommet, retaining nut, and if necessary a valve core. Use a torque wrench to tighten to the proper spec.
- Rotate the tire machine turntable so the valve stem on the wheel is 90 degrees away from the head on the tire machine.
- Mount the tire.
- Set the tire pressure to the proper pressure and install a new valve cap.
About the Author

Barry Hoyland
Barry Hoyland has been in the independent aftermarket for more than 45 years as a technician, technician instructor, shop owner, and shop management consultant. He owned and operated a successful Southern California automotive repair center that offers complete auto care and specialized in emission and diagnostic services for over 28 years. Hoyland also owned a company that modified vehicles to perform as emergency response units and mobile command centers, incorporating high-end electronic components into today’s vehicles. Hoyland has experience with all size and types of vehicles including traditional gas, hybrid electric, alternative fuel, and heavy duty diesel trucks.
Hoyland has provided consulting services for many automotive shops, fleets, and government agencies in order to improve their operational efficiencies.
In addition, he has worked with many NHRA drag racing teams as a crew chief on supercharged alcohol and nitro-methane fueled cars and currently serves as a crew chief on a Top Alcohol Funny Car, a Nostalgia Funny Car, and a Nostalgia Alcohol Dragster
Hoyland holds certifications in ASE: A1, A6, A8, and L1, MACS 609, maintains a California Advanced Emission license, and a CDL with endorsements for double and triple trailers, tankers, and HazMat.
When he is not helping to run a shop in the Pacific Northwest, Hoyland travels across the U.S. as an instructor of technical and shop management courses, many of which he has developed.
