Scan tools, code readers, and professional diagnostics
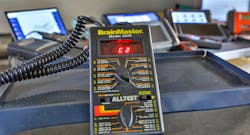
The first scan tool I purchased back in the early 80’s was an Alltest 3226 BrainMaster (Figure 1), which I believe was one of the very first scan tools to enter the aftermarket. The unit covered Chrysler, Ford, and GM vehicles. Today, there are a multitude of scan tools available, but their uses and capabilities vary tremendously. First, I would like pay tribute to the late Jack Heyler, an industry pioneer and technical advocate, for his tireless efforts back in the 80’s in promoting a standardized diagnostic connector and more for what would later become OBD-II. Back then, I really didn’t know “Jack,” in both senses of the word, but I knew that all the manufacturers had different data access ports requiring different cables, software cartridges, adapters, etc. to “talk” to the vehicle.
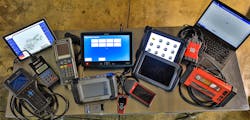
If you were working in the industry back then and tasked with diagnostics on multiple car lines, then I think you’d agree with me that we have a lot to be thankful for today. At the shop, we maintain a number of both OBD-I and OBD-II diagnostic scan tools (Figure 2).
At my shop located in Southern California, the vehicle fleet we see typically lives a longer life due to our mild climate. As I write this column, we have two OBD-I Ford Motor vehicles in the shop for diagnosis. Both of these vehicles are from the late 80’s, and although they have a “scan tool” connection, this connection did not offer any data stream or live data to analyze (these features would later appear in the early 90’s). Back in these early days, Ford was developing their diagnostics to deliver what they felt the technician would need in order to diagnose vehicle systems that entered failure mode.
Ford’s initial generation of diagnostics were formally titled Electronic Engine Controls, beginning with generation one and often displayed as EEC-I through EEC-V (pronounced “EEK FIVE”). Ford offered a way to perform a key on, engine off (KOEO) self-test which would run circuit diagnostics and produce diagnostic trouble codes, providing the technician some direction. There was also a key on, engine running (KOER) self-test that would test other inputs and outputs dynamically, which dramatically increased diagnostic assistance. These tests are still offered today on Ford Motor vehicles and prove to be a valuable commodity.
If you happened to be working on General Motors’ vehicles back in that timeframe, you would have grown accustomed to being able to query the vehicle for Diagnostic Trouble Codes (DTCs), view and record live data, and perform bidirectional tests. Looking back, I can remember being disappointed when I connected to one of those early Ford vehicles and discovered that a datastream was unavailable. At the time, I was too naive to realize that Ford was really trying to help guide the technician to the problem through their built-in diagnostic routines.
Beginning in 1996, OBD-II normalized the data port connection, DTCs, data parameters, and more with a primary goal of helping service technicians diagnose vehicle performance issues affecting emissions.
What does it mean to “scan”?
In my opinion, the term “scan” is widely used but often misunderstood. Most professional technicians would likely agree that the “scan” you get at places like a parts store widely varies from what a professional technician would do when scanning the vehicle. As you can see, this can lead to confusion for the average motorist who is bombarded with commercials and online ads promoting free diagnostics.
Technicians usually connect a scan tool when there is a problem with the vehicle. However, In my shop, every vehicle that comes in for routine service gets a full scan, or what is otherwise known as a health check. When a technician is addressing a problem, the first thing that I believe most do is query the various vehicle controllers (ECM, PCM, TCM, etc.) for DTCs.
Now that you have a code or two, what do you do? In my personal view (and I believe many of my colleagues would agree), the DTC only tells part of the story; there is a ton of diagnostic data that should be gathered before moving on.
OBD-II vehicles offer up a number of additional clues through Mode$01 (live data) Mode$02 (freeze frame), Mode$06 (diagnostic test results), Mode$09 (in-use performance testing), and so on (see Table 1 for more details). These can go a long way in aiding the technician who is essentially tasked with being a “scientific diagnostic investigator,” as my colleague and friend Jorge Menchu from Automotive Electronic Services would say.
For instance, if you have a vehicle that comes in and has a ton of network communication codes in multiple modules, one might want to take a look at the basics like battery health, connections, starting/charging, etc. The 12V battery is the foundation electrical system and when this system is in poor health, one can expect that to cause all sorts of random errors, such as those previously mentioned.
Think about how these modules “wake up” and report for work. If any of these modules experience a voltage supply that dips below say 9V, that module could temporarily drop offline. This is especially true during vehicle startup and is why battery health is so critical these days.
Now on to the freeze-frame – one should always try and source this information as it can help to surface many clues that could prove to be useful. In one recent case we had at my shop, a vehicle arrived with a complaint of a flashing malfunction indicator light (MIL) and rough running. The following DTCs were stored: P0300, P0302, P0304, and P2198.
When the freeze-frame was reviewed for the P2198, two indicators provided further clues to help begin to form a hypothesis. The glaring clue I observed was that the bank two long-term and short-term fuel trim values, together, accounted for more than a 40 percent subtraction of the determined fuel delivery from that bank. What we discovered was that the B2S1 HO2S was mis-reporting a rich condition, which resulted in the ECM leaning out bank two to the point where lean misfires began to occur.
One should have a process in place that allows them to structurally organize this information. My recommendation is to store these within the work order. Many shop management systems allow for technician notes, and some even store scan tool reports, pictures, videos, and more. When you’re assembling your data, think about how your data will tell the story about the vehicle’s state of health to the customer. Doing so will help improve your customer communications and help everyone involved understand the vehicle condition and needed services.
I think we can all agree that there isn’t an “easy button” (and I don’t think there ever will be) on the scan tool. This is because the automobile is one of the most sophisticated devices anyone will ever use in their lifetime. Therefore, these complicated devices actually require skilled technicians to carry out the appropriate test routines when performing diagnostic analysis.
I believe that one should always operate forensically by pulling essential information and properly storing it prior to performing any intrusive testing. Adherence to this discipline can save you time in the long run. It’s been my experience that oftentimes the client brings the vehicle in well after the MIL first appeared. This situation can really complicate matters, especially when other systems or components start to become deficient after the first failure.
When you log and document all the DTCs on the vehicle before commencing repairs, you now have a record of what failures existed before you began addressing the vehicle’s current condition. This rings especially true on vehicles possessing both persistent and intermittent DTCs. Maintaining a log of all DTCs is a crucial aspect to the repair process; after addressing the persistent DTC through repairs, subsequent scans may result in clearing multiple DTCs. Having logged the data, this information will provide a clear picture to the customer of the entire repair process, as well as an understanding that should the MIL illuminate down the road and a previously active DTC presents itself, it is not a returning issue, but rather a new repair to be addressed. It’s fair to assume that all professionals want to return a vehicle to service in the highest roadworthy condition possible, and when one is presented with a plethora of DTCs, we can only fix what we see and validate as broken at the time.
When we look at OBD-II and how it has evolved, there’s a lot being offered within the generic side. Currently, there are ten services (initially they were called modes, such as Mode$06), listed below:
- 01 Display current diagnostic parameter data
- 02 Display freeze-frame data from stored DTCs
- 03 Display stored DTCs
- 04 Clear DTCs and stored values
- 05 Test results, oxygen sensor monitoring (non-CAN only)
- 06 Test results, other component/system monitoring (test results, oxygen sensor monitoring for CAN only)
- 07 Display pending DTCs (detected during current or last driving cycle)
- 08 Control operation of on-board component/system
- 09 Request vehicle information (VIN, test conditions, counts, etc.)
- 0A Display permanent DTCs (cleared DTCs)
- Table 1 – OBD-II diagnostic services (service modes)
When it comes to choosing a scan tool, one needs to become highly familiar with the tool’s strengths and weaknesses. Even at the OEM level, some of their tools make it difficult to obtain the info the technician needs quickly. Oftentimes, I find that the OBD-II generic information is all I need to begin painting the picture.
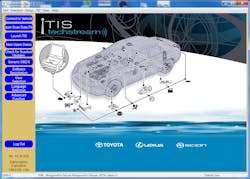
Earlier I mentioned the term “health check” and wanted to touch upon one OEM who has incorporated that operation into their diagnostic platform. Toyota’s Techstream application (Figure 3) offers up a very effective set of diagnostic tools and functionality. It is available to the aftermarket where all you need is a compliant PC or laptop, along with a J2534 interface. When the health check function is chosen by the technician, the tool will sweep across all vehicle modules and check not only for DTCs, but calibration updates as well.
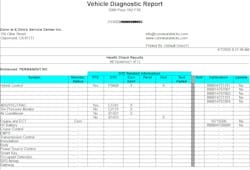
Each DTC that contains freeze-frame information will be offered up through a single click. If one were to investigate module software updates, they would be taken to linked service information. The service information would then take the technician to service bulletins to help guide the technician to decide if the software update is needed for this particular vehicle. On the initial health check scan, Toyota produces a fairly comprehensive report (Figure 4) to serve as a great starting point to begin research.
Aftermarket diagnostic tools
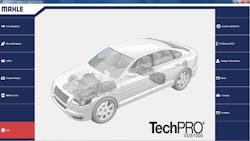
There are many tools to choose from in the aftermarket. One of the fastest, full-vehicle health-check-type tools I’ve found is the MAHLE TechPRO (Figure 5). This PC-based scan tool works very well on GM and Ford applications, which makes sense since they support some of their respected OEM back-end systems. On most CAN vehicles (2008 model year and beyond), their tool allows the technician to select the customer report option and produce a pre- or post-scan report with a single click. The tool will then query all modules for DTCs, and the MODE$06 information from the engine controller and produce a single report that can be saved as a PDF and printed or attached to the work order. This operation happens rather quickly and is the only one I’ve observed thus far to work this fast.
Diagnostic mode
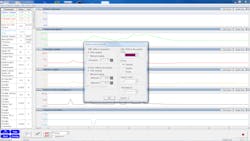
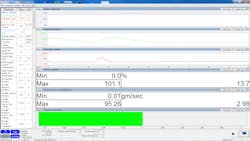
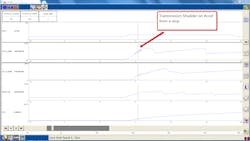
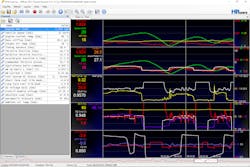
When it comes to observing data, and depending on the task, I prefer to have display options that allow me to not only graph but also control the scaling. Some scan tools have limitations, and I recommend you review your options when selecting scan tools. Toyota’s Techstream (Figures 6 and 7), Ford’s IDS (Figure 8), and one of my favorites, the VCM Scanner by HPTuners (Figure 9) allow for a wide range of scaling and display options. The VCM scanner also allows one to generate custom parameter IDs (PIDs) such as math channels. Some of the OEM tools also contain specialized tests designed to help identify specific service issues that may have plagued one of their vehicle platforms and/or powertrain systems. For example, the Ford IDS sets up specific PIDs in order to assist in analyzing specific transmission issues (Figure 10).
Diagnostic support
Some tool manufactures have support integrated into the tool. Drew Technologies, Autologic, Autoenginuity, and Blue-link are now under one company, OPUS | IVS, and offer the DrivePro scan tool. The tool is supported on the back end by highly talented diagnostic technicians that can help guide one to a solution when support is needed.
The future
OBD-II regulations are always evolving, and we’ve already seen some new solutions being implemented, such as the 3-byte DTC which provides additional information as to the failure mode that the DTC was set for. Moving forward, I’ve been told that many of the advanced utilities found within OEM tools will soon be available in generic modes. As more safety systems get embedded into the vehicle, being able to access the right data when you need it will become a critical part of the service and repair business. With the introduction of the secure gateway (SGW) on vehicles, access to non-emission related modules will be unavailable without certain credentials provided through the use of OEM or select aftermarket tools. Follow groups such as the National Automotive Service Task Force (NASTF), Equipment Tool Institute (ETI), AutoCare Association, and others to get a glimpse of what the future of data access might look like.
Knowledge and education
Knowing how to best leverage a tool can come from both external training and internal self-training. Through your own persistent research, you can learn a lot through self-discovery. If you’re interested in staying in touch with current trends and best practices around diagnostics, then I invite you to check out Diagnostic Network (diag.net) where you’ll find some very sharp professionals helping each other with advanced technologies.
