Advanced driver assistance systems (ADAS), has quite literally been all the rage for the last several years. So many articles, social media groups, forums, training classes, and podcast episodes have become dedicated to the subject. But why? For starters, in a profession where technology is always evolving, this was a big change from normal service. ADAS is not really all that new, arguably debuting back in 1999 with Mercedes-Benz “Distronic,” which used radar for adaptive cruise control (ACC). But now we are seeing it on virtually every high-line vehicle, and it's absolutely trickling down to the more economical models.
Another reason. Far too few mechanical repair shops know enough about ADAS, namely when a calibration is required. Collision shops are very aware, and glass replacement companies are wising up, but it's still far too common of an occurrence that a repair shop doesn’t know when a calibration should be performed after seemingly non-related service work or worse, “warnings” are ignored. Service information or even wheel alignment equipment advice about a calibration requirement is given, yet it is ignored.
I could get going on a serious tangent just discussing all the names different manufacturers assign the different features. It's such an issue that many groups have come together, led by AAA, the National Safety Council, Consumer Reports, J.D. Power, and SAE International to help educate consumers on the benefits, limitations, and proper usage of these technologies by establishing standardized naming that is simple, specific, and based on system functionality.
But this is PTEN, and the focus is, and should be, on the tools and equipment used to maintain, diagnose, and/or service automobile systems and, in this case, ADAS.
ADAS calibrations really come down to two distinct procedures: static or dynamic (and sometimes a combination of the two).
Dynamic calibrations
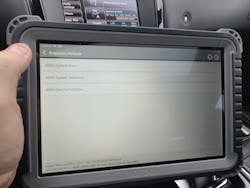
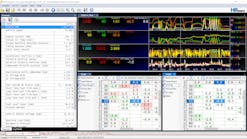
Dynamic calibrations, for the most part, instruct us to verify that the camera, sensor, or radar are properly mounted and leveled. This is where the electronic level/angle gauge is used. A scan tool is used (Figure 1) to put the system into a learn or adaption mode and the vehicle is driven within parameters outlined by service information — and often conveniently laid out on the scan tool — until the calibration is complete. Some carlines, like Chrysler for example, are very nice to us in that they display on the scan tool a percentage leading up to the system calibrating. Others, like Ford and Kia, do not, and you are left driving around waiting for the learn to complete.
There are always outliers, so giving hard numbers for the amount of time for a system to finish calibrating is difficult, but I expect most to complete in 15 to 20 minutes or less. After that time period, I’m often pulling over to the side of the road and checking for any diagnostic trouble codes (DTCs) to give me a clue about potential issues preventing the calibration from completing.
With dynamic calibrations, you need to take into account if a camera is being calibrated, like a forward-facing camera or a radar, like a millimeter-wave radar. Sensor fusion — where there are multiple cameras or a combination of cameras and radar — is being used to accomplish a goal such as autonomous emergency braking or adaptive cruise control. Knowing what is being calibrated can help you with the environment you are driving in. Take, for instance, radar. Radar is probably not concerned with lane markings, but genuinely concerned with obstacles such as trees, guardrails, other vehicles, telephone poles, etc. Cameras may take some of that into account, but a camera really cares about lane markings, especially if it's used for lane keep assist.
Static calibrations
Static calibrations, however, require targets. There’s no beating around the bush here, there are lots of targets. Every manufacturer has their own target designs and even then they often differ by platform (or year range) of their vehicle line-ups. So, what does it take to do these calibrations (namely the static calibration) in the real world? First of all, you need space and lots of it. Open, flat, properly lit (not too bright), space. Maybe you have an area in the shop that can be cleared out quickly. Maybe you need to take into consideration leasing or buying a building where you perform calibrations. But the reality is, for many of these calibrations you will need space. Like everything, it depends on the system as to how much you will need. Many aftermarket calibration system manufacturers/distributors suggest a space of 30’ by 45’. But this is a general suggestion and dependent on what vehicles you are serving.
Second, you need to have quality resources for service information. This may seem elementary, but in talking to a few different technicians around the country, I can tell you this isn’t as uncommon as it should be. Depending on the year of vehicle, you may need to subscribe to OEM sites directly. A really good source for how to get OE service information and/or scan tools is nastf.org. You need to be a member, but luckily membership is free. Then just go to the automaker info page (Figure 2) and select the manufacturer of interest.
Third, you are going to have to hit the hardware store. A couple of plumb bobs, masking tape (I prefer the wide painter’s variety), chalk, permanent marker, braided mason’s line, electronic level/angle gauge, laser level (I recommend multiple beam to save time when looking for positions at right angles to vehicle centerline), and a tape measure. Do yourself a favor and make sure your tape measure is metric — specifications are all in the metric system (Figure 3).
And lastly, of course, are the targets themselves. You can choose between OE and aftermarket. It's challenging when you service multiple carlines, as many vehicle manufacturers don't have guides or bulletins with a list of the required equipment across their vehicle platforms. To determine what you will need, you will need to sift through the procedure, jotting down the equipment “part” numbers, and then calling the dealer service department or finding a distributor, like an online warehouse, to order up the pieces. Be patient when doing this.
ADAS calibration systems
You have options when choosing an aftermarket ADAS calibration system (Figure 4). Aftermarket systems play well to shops that service multiple carlines, as they sell kits that include many targets and give you a chance to essentially hit the ground running. The cost of these kits may seem hefty, but there is some cost savings with the reduced time investment in searching for the more ala carte offerings from the manufacturers. There are features from the aftermarket offerings that can improve efficiency. Some of the targets/reflectors (Figure 5) include built-in laser pointers, rulers, levels, and leveling screws. This saves you time by speeding up the process of aligning the target with the camera/radar being calibrated or squaring up the target with the centerline of the vehicle.
Now I would like to let you in on the secret to successful ADAS calibrations: Follow the instructions to the letter. Do not skip ahead and do not wing it. Some carlines do not want any obstructions as you begin the process, so skipping ahead to set up the target will cause the calibration to fail. You need to follow the directions as written and leave the area in front of the vehicle open until you are instructed to place the target.
ADAS is already here, in your bays right now, and services you are performing that disturb the cameras or radars require re-aiming prior to releasing a vehicle to your client. Hopefully, with this article as a guide, some research, a little reorganization or perhaps shop area expansion, equipment purchases, and some training, you can provide these services for your clients and if anything like my situation, for your local collision shops, glass companies, and even your competition.


